


Harbor is an indispensable open-source container image registry, offering robust features like policy-driven security, role-based access control, vulnerability scanning, image signing, image replication and distribution. Deploying Harbor is a common and critical step for organizations looking to streamline their containerization workflows. Harbor offers significant value through its comprehensive features and can be deployed on a virtual machine.
This blog post will pick up where we left off, guiding you through the process of deploying Harbor on an upstream conformant Kubernetes platform using Helm
If you are interested to learn more about Harbor and how to deploy it on a VM, check out our previous blog.
Why deploy Harbor on Kubernetes?
Deploying Harbor on Kubernetes offers several advantages:
- Scalability: Kubernetes enables horizontal scaling of Harbor components based on demand. Individual microservices can be scaled independently to handle increased load.
- High availability: Kubernetes provides built-in mechanisms for pod recovery, health checks, and self-healing. If a Harbor component fails, Kubernetes automatically restarts it, ensuring minimal downtime.
- Resource efficiency: Kubernetes optimizes resource utilization through efficient scheduling and resource allocation
- Declarative management: Infrastructure-as-Code practices with Helm charts make Harbor deployments reproducible, version-controlled, and easy to maintain across multiple environments.
- Native integration: Running Harbor on Kubernetes creates a seamless experience for containerized workloads, as both the registry and the applications consuming images exist within the same ecosystem.
- Simplified updates: Helm makes upgrading Harbor versions straightforward with rolling updates that minimize service disruption.
Understanding Harbor architecture and components
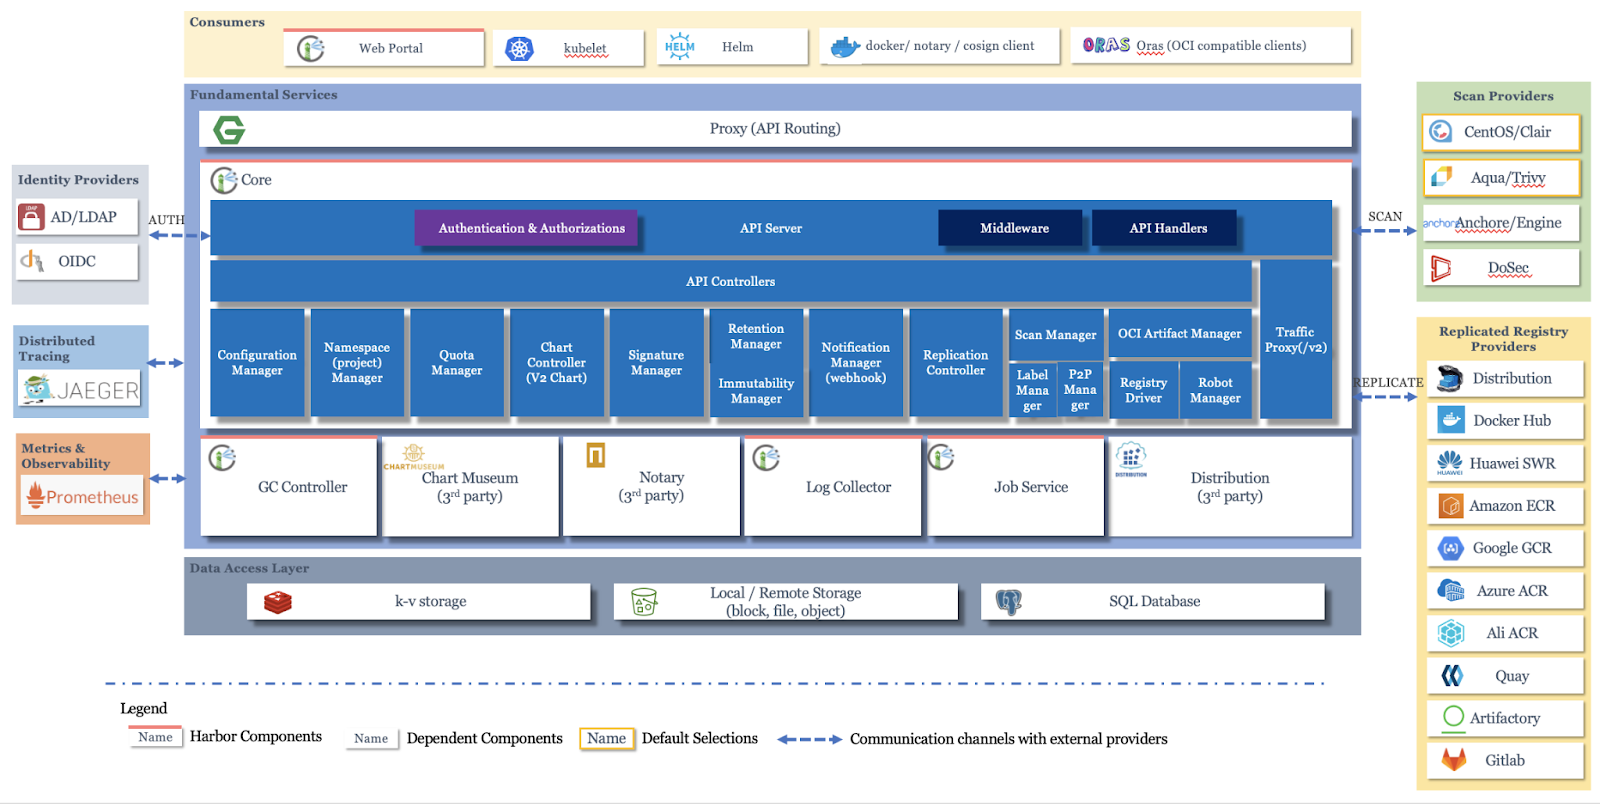
Harbor follows a microservices architecture, with each component serving a specific purpose in the overall container registry ecosystem. Understanding these components is crucial for effective deployment, troubleshooting, and optimization.

Image Source: Official Harbor GitHub repository
Core Harbor components:
- Harbor Core: The central component that provides the main REST API. It handles user authentication, authorization, project management, and coordinates communication between other Harbor services. This is the primary interface through which users and automation tools interact with Harbor.
- Harbor Portal: A web-based user interface built with Angular and Clarity that provides an intuitive graphical interface for managing registries, projects, users, and configurations. It communicates with the Harbor Core API to perform all operations.
- Harbor Registry: Based on the open-source Docker Distribution project, this component is responsible for the actual storage and retrieval of container images. It handles the Docker Registry HTTP API v2 protocol, managing image layers and manifests.
- Harbor Job Service: Manages asynchronous tasks and background jobs such as image replication between Harbor instances, garbage collection to reclaim storage space, and vulnerability scanning operations. It uses a queue-based system to process jobs efficiently.
- Harbor Database (PostgreSQL): Stores all Harbor metadata including user accounts, projects, access control policies, audit logs, and image metadata. By default, Harbor deploys its own PostgreSQL instance, but you can configure it to use an external database for production environments.
- Harbor Redis: An in-memory data store used for caching and as a message broker between Harbor components. It improves performance by caching frequently accessed data and facilitates communication for real-time operations. Harbor deploys its own Redis instance, but you can configure it use an external redis for production environments.
- Trivy (Vulnerability Scanner, Optional): Harbor integrates vulnerability scanning capabilities through Trivy. Trivy scans container images for known security vulnerabilities by comparing image contents against CVE databases, providing detailed reports on security issues.
For an in-depth understanding of the Harbor architecture, refer to the “Architecture Overview of Harbor” Wiki page on Harbor’s official GitHub repository.
How these components work together:
When a user pushes an image to Harbor, the request flows through the Harbor Core, which authenticates and authorizes the operation. The image data is then stored by the Registry component, with metadata saved in PostgreSQL. The Job Service can then trigger a vulnerability scan, with results stored back in the database. Redis caches frequently accessed data to improve response times. When replication is configured, the Job Service handles copying images to other Harbor instances asynchronously.
This distributed architecture ensures scalability, resilience, and separation of concerns, making Harbor suitable for enterprise-grade deployments.
Deploying Harbor on Kubernetes using Helm
- Prerequisites:
- A running Kubernetes cluster
- kubectl is configured to interact with your cluster.
- Helm (recommended) for simplified deployment.
- Persistent storage provisioner (e.g., NFS, iSCSI etc.). You can also configure an object storage to store the blobs of the artifacts. This is widely used for users deploying an HA instance of Harbor
- A load balancer/ingress controller/gateway API to expose Harbor services
- Download Harbor Deployment Manifests: Obtain the official Harbor Helm charts or raw Kubernetes YAML files. Helm is typically preferred for its ease of configuration and management.
> helm repo add harbor https://helm.goharbor.io
> helm fetch harbor/harbor --untar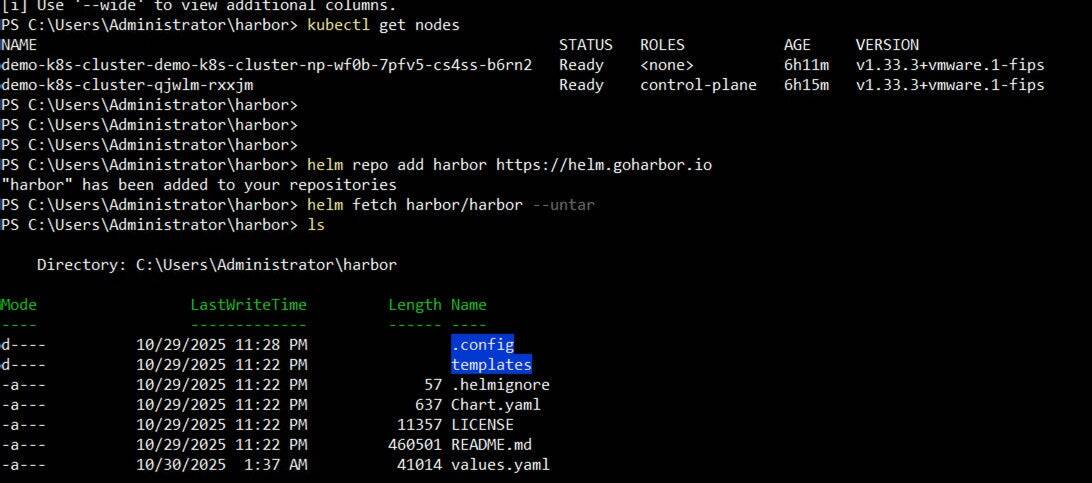
- Configure values.yaml: Customize the values.yaml file (for Helm) to define:
- External URL.
- Storage class for persistent volumes.
- Database configuration (internal or external PostgreSQL).
- Redis configuration.
- Security settings (TLS/SSL certificates).
- Administrator credentials.
For our particular scenario, we change:
- Set expose.type to loadBalancer
- Set expose.tls.auto.commonName (Needed when expose.type is not ingress)
- Set expose.ingress.hosts.core to the External URL FQDN
- If there is no default storage class set on your cluster, then set the storageClass for all the pods in the persistence section.
- Set the externalURL FQDN
- Deploy Harbor: Use Helm to deploy Harbor into your cluster.
> helm install harbor harbor/harbor --namespace harbor --create-namespace -f values.yamlThis command will create the necessary deployments, services, statefulsets, and persistent volume claims for Harbor.

- Optionally, there is a manual step to setup the load balancer that is used for the Harbor external IP. In our case, we have already set that up.
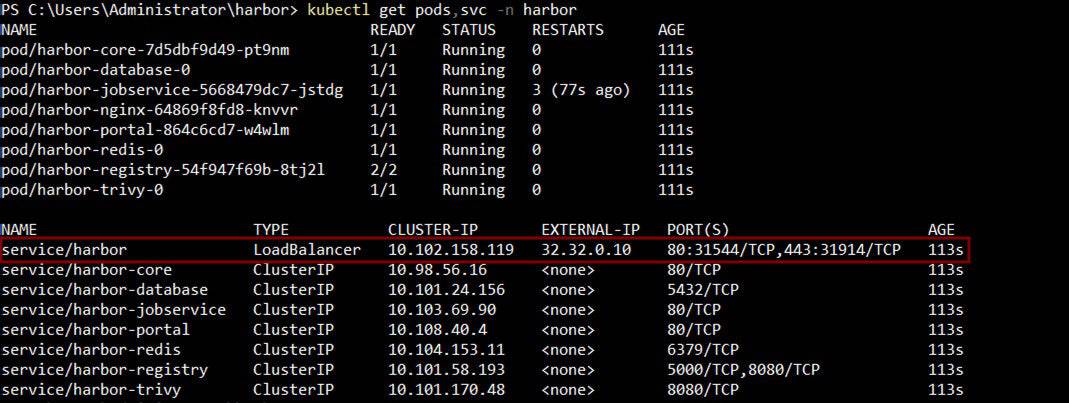
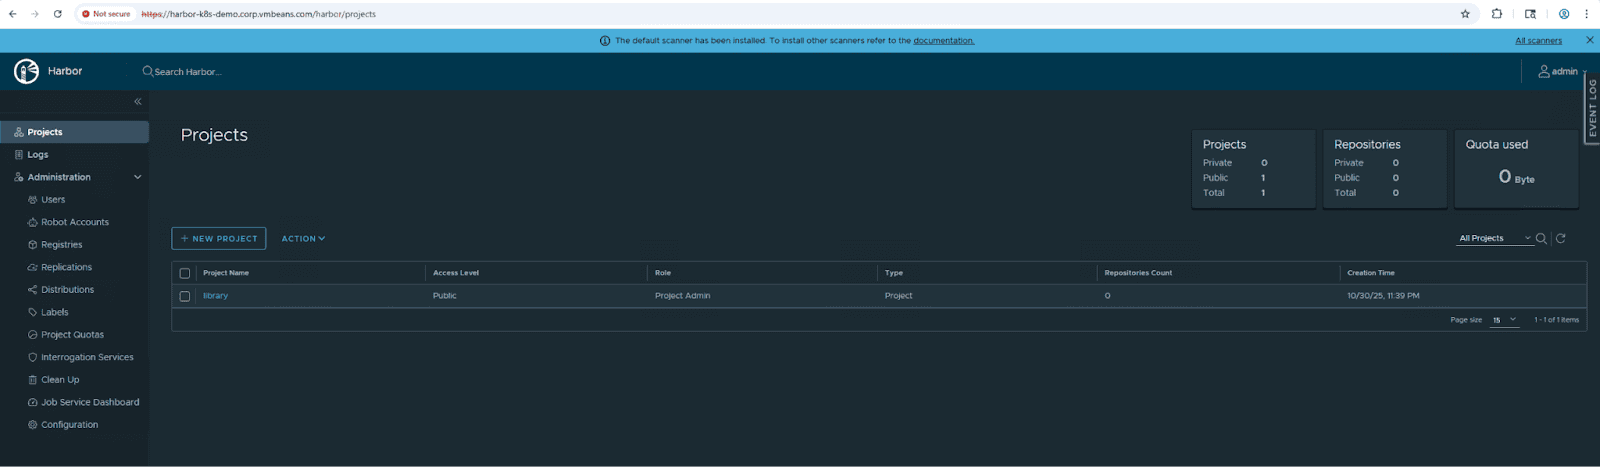
- Verify deployment: Check the status of Harbor pods, access the UI, and perform a test push/pull of an image.
This concludes the deployment of Harbor on a kubernetes cluster using Helm. This gets Harbor up and running however does not make it production-ready as it is missing SSL certificates that need to be set up and managed manually as well as the load balancer that fronts the Harbor service.
Additional considerations for production deployments include implementing backup and disaster recovery strategies for the Harbor database and registry storage, configuring high availability with multiple replicas of core components, setting up monitoring and alerting using tools like Prometheus and Grafana, and implementing proper access control policies and RBAC configurations.
Summary:
Deploying Harbor on Kubernetes provides a robust, scalable, and cloud-native solution for container image management. By leveraging Helm charts and Kubernetes orchestration capabilities, organizations can quickly deploy Harbor with minimal manual configuration while benefiting from Kubernetes’ built-in reliability and scaling features.
Key takeaways from this deployment guide include understanding Harbor’s microservices architecture, properly configuring persistent storage and networking, and verifying functionality through the UI. While this basic deployment gets Harbor operational, additional hardening and production-readiness steps are necessary for enterprise environments.