

In the evolving landscape of application deployment, containerization with Kubernetes (K8s) has become the new standard. As organizations adopt Kubernetes at scale, public image registries often bring new challenges, from rate limits and escalating costs to limited control over sensitive data.
Harbor bridges this gap as an open-source, enterprise-grade container registry that brings security, performance, and sovereignty to container image management. It seamlessly integrates with existing operational paradigms, providing a robust solution for modern container image management needs.
Open-sourced in 2016, Harbor joined the Cloud Native Computing Foundation (CNCF) on July 31, 2018, and graduated on June 15, 2020, as its eleventh project – a milestone that reflects both its maturity and its vibrant community.
Today, Harbor remains one of the most widely adopted CNCF projects for secure image management across hybrid and private cloud environments. The active community drives continuous innovation. Each release adds new integrations, security features, and performance improvements, ensuring Harbor evolves alongside enterprise cloud-native needs.
Recent highlights include:
- v2.13: Integration with CloudNativeAI (CNAI) for AI model management, extended audit logging, and enhanced OIDC with PKCE support
- v2.12: Integration with ACR and ACR EE Registry
- v2.11: Native SBOM generation and management
What is Harbor?
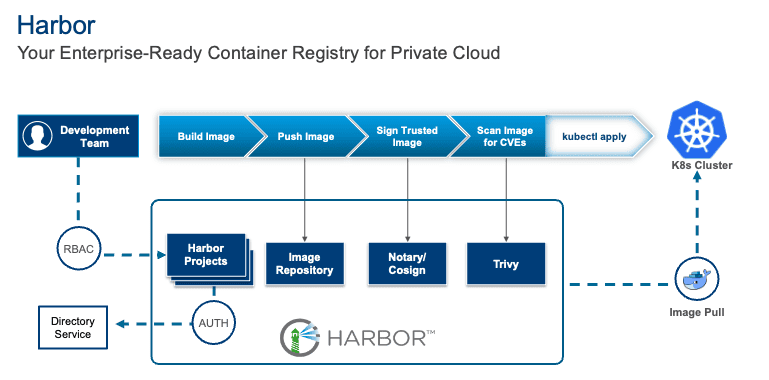
At its core, Harbor provides a centralized repository for managing container images. Think of it as a private, feature-rich registry for your organization, with robust security and management features built in. Key features include:
- Security: Image vulnerability scanning, content trust, and role-based access control.
- Replication: Replicate images across multiple Harbor instances for disaster recovery and content distribution.
- Extensibility: Integrates with LDAP/AD for user management, and supports various storage backends.
- Management: A user-friendly UI for managing projects, users, and images.
For organizations looking to deploy both VM-centric deployments as well as Kubernetes, Harbor offers a familiar sense of control and enterprise-readiness that aligns well with existing operational paradigms.
Setting Up Harbor
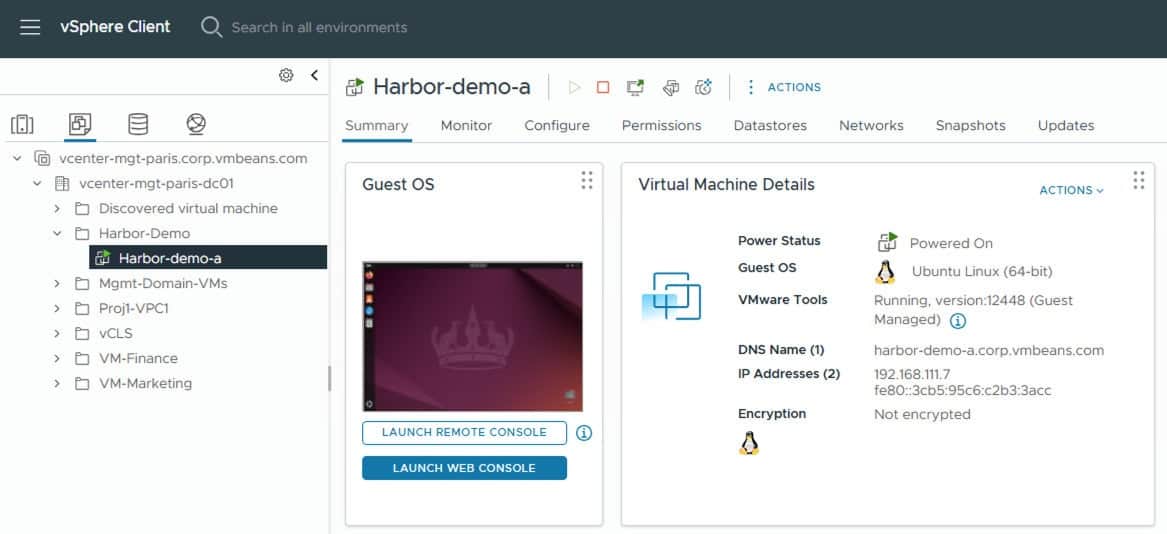
Let’s explore how to set up Harbor, focusing on deploying it on a VM. In this example, we’ve used a VMware vSphere environment to deploy Harbor on a VM.
Prerequisites
Before you begin, ensure you have:
- A Linux VM (Ubuntu or CentOS recommended) with at least 2 vCPUs, 4GB RAM, and 40GB storage.
- Docker Engine and Docker Compose installed on the VM.
- A fully qualified domain name (FQDN) for your Harbor instance (e.g., harbor.yourdomain.com).
- SSL certificates for your FQDN (or you can generate self-signed certificates for testing).
Deploying Harbor on a VM
We have already created an Ubuntu VM and assigned it to the network. We have also added a DNS entry for our new harbor instance:

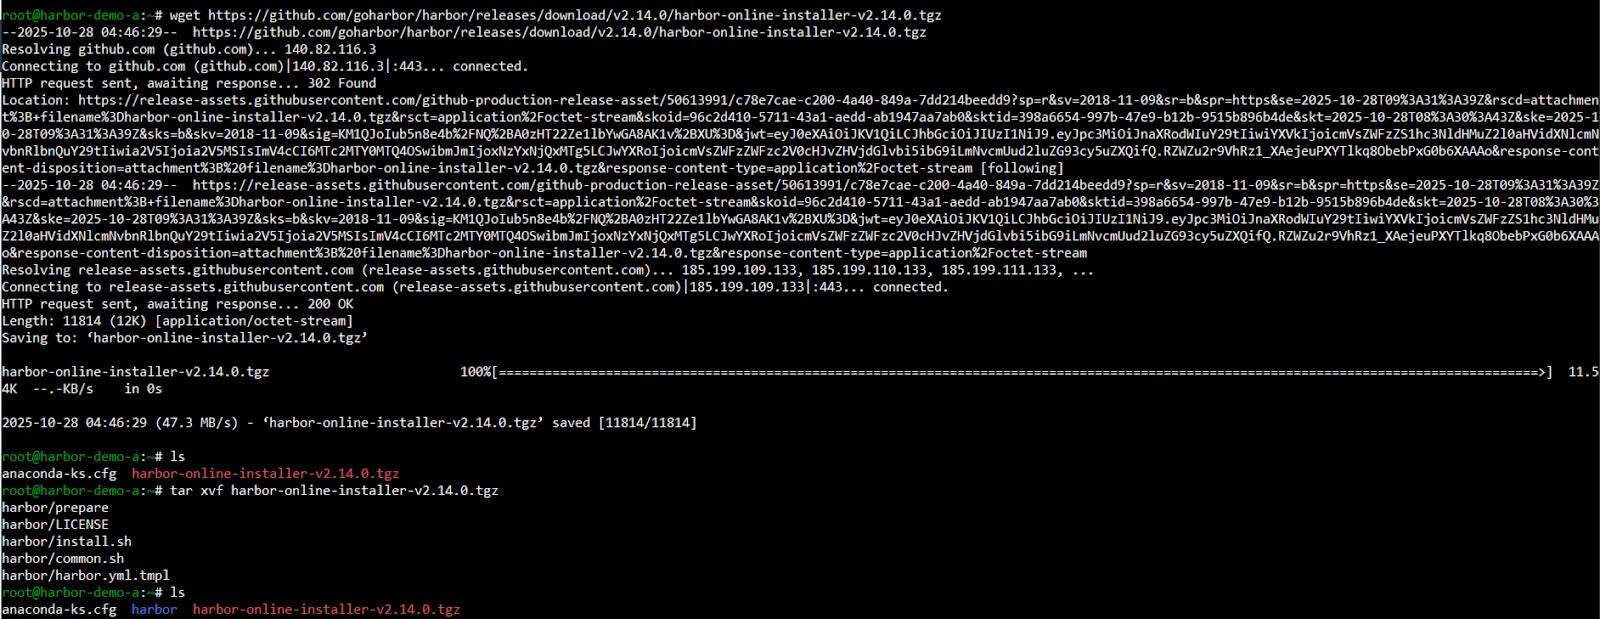
- Download the Harbor Installer:
wget https://github.com/goharbor/harbor/releases/download/v2.x.x/harbor-offline-installer-v2.x.x.tgz

tar xvf harbor-offline-installer-v2.x.x.tgz

cd harbor
Note: Replace v2.x.x with the latest stable version of Harbor.
- Set up certificates for enabling Harbor with HTTPS
For using HTTPS with Harbor, follow the guide to set up the SSL certificates:

- Configure Harbor:
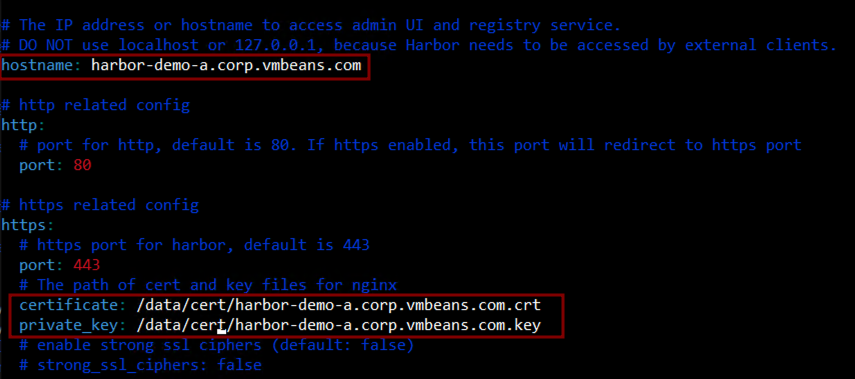
Navigate to the harbor folder from the extracted tar file and copy the harbor.yml.tmpl to harbor.yml file. Edit the harbor.yml file to configure your Harbor instance. Key parameters to adjust include:
hostname: Your FQDN for Harbor.http_port / https_port: Standard ports for HTTP/HTTPS.harbor_admin_password: Set a strong password for the admin user.data_volume: The directory where Harbor will store its data.- SSL Configuration: If using custom SSL certificates, update the certificate and
private_keypaths.
# Example for harbor.yml

hostname: harbor.yourdomain.com

https:

  port: 443

  certificate: /etc/harbor/certs/harbor.yourdomain.com.crt

  private_key: /etc/harbor/certs/harbor.yourdomain.com.key

harbor_admin_password: your_secure_password

data_volume: /data/harbor
These are the parameters we updated for our deployment:
- Install Harbor:
Run theinstall.shscript. Harbor provides an option to install Trivy, which is a built-in security scanner in Harbor, using the –with-trivy flag.
sudo ./install.sh --with-trivy
- This script will set up Docker Compose, pull all necessary Docker images, and start the Harbor services.
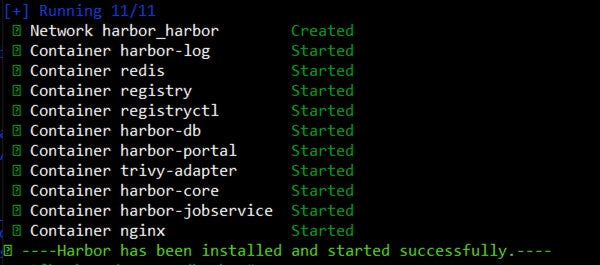
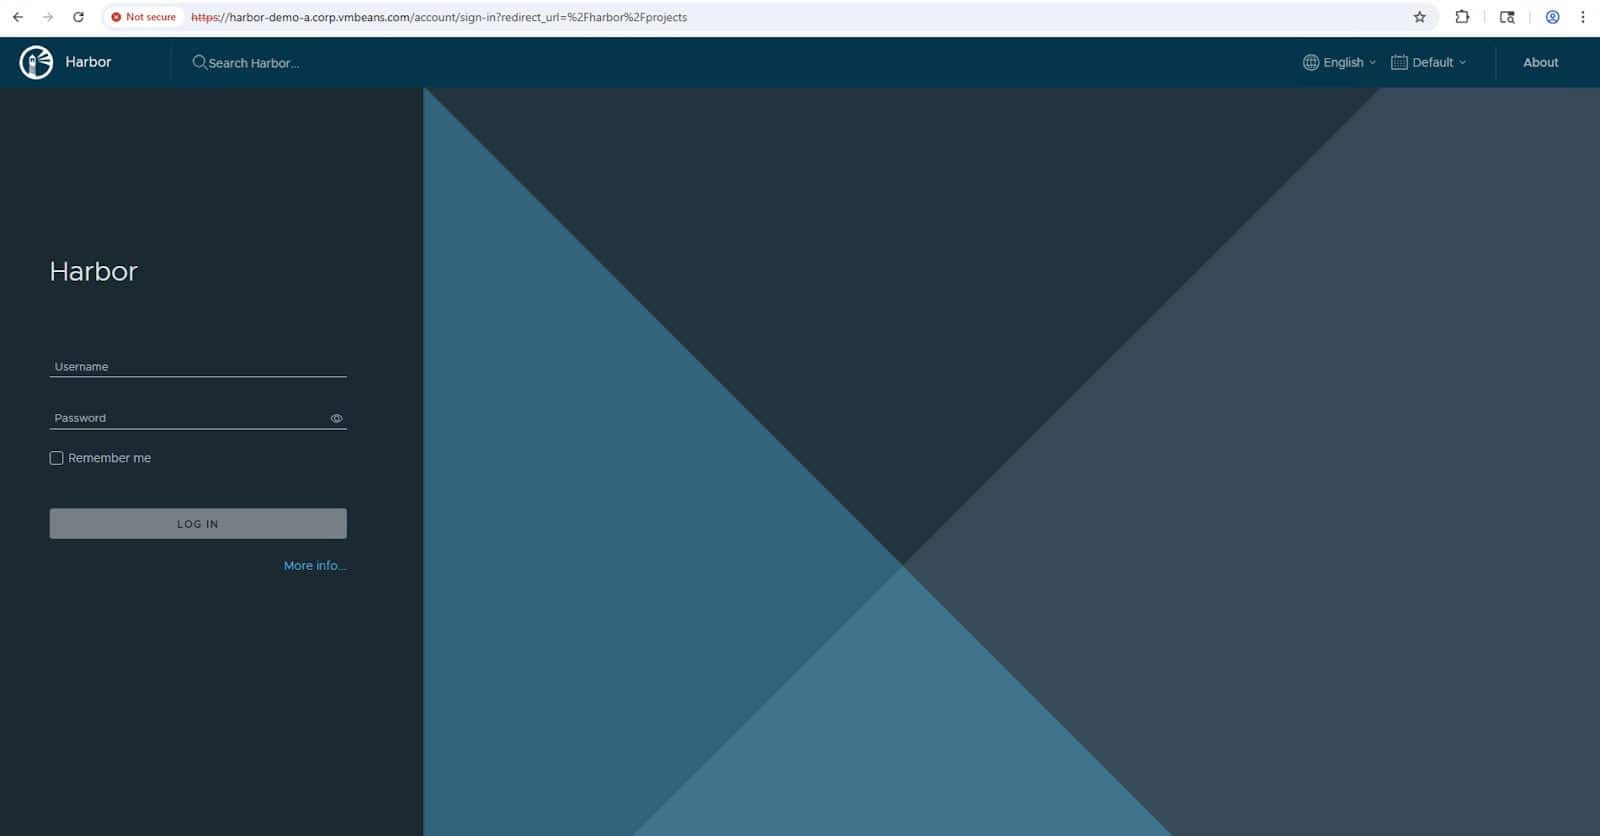
- Access Harbor UI:
Once the installation is complete, you should be able to access the Harbor UI in your web browser athttps://harbor.yourdomain.com. Log in with the admin user and the password you set.
Using Harbor as an Image Registry
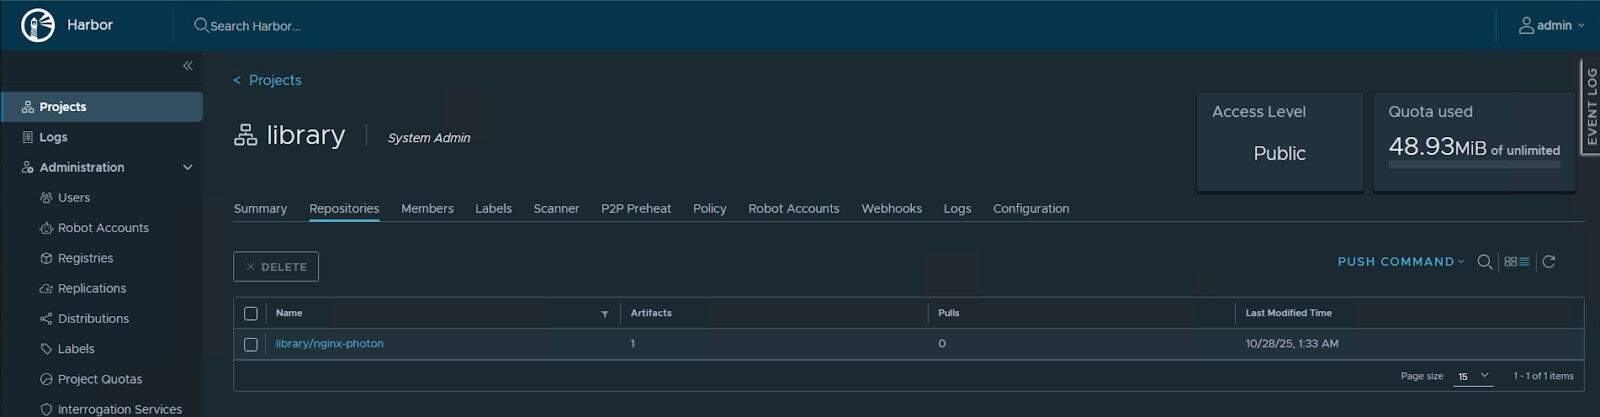
Once you log in to Harbor, the default landing page is the Projects page. You can create multiple projects in Harbor to separate the artifacts stored by different teams or sub-organizations within an enterprise.
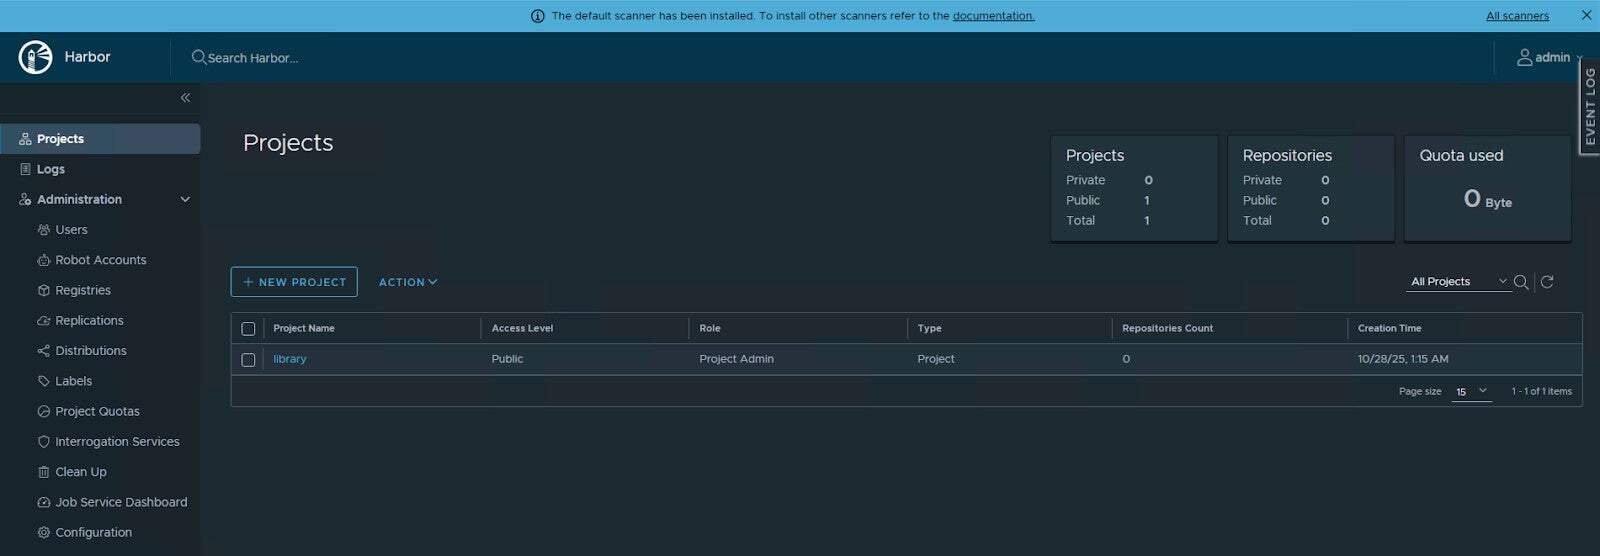
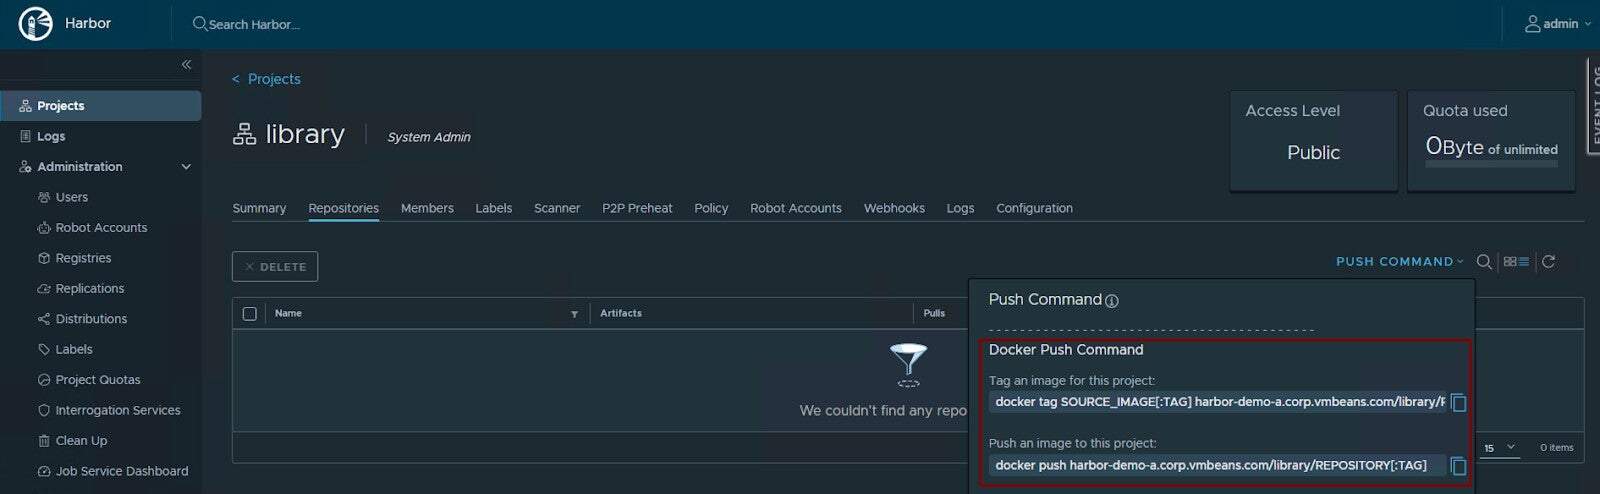
Let’s use the default project “library” and use it to host a container image. Navigating into the project “library”, we can see the commands to use to tag and push an image using the Docker command.
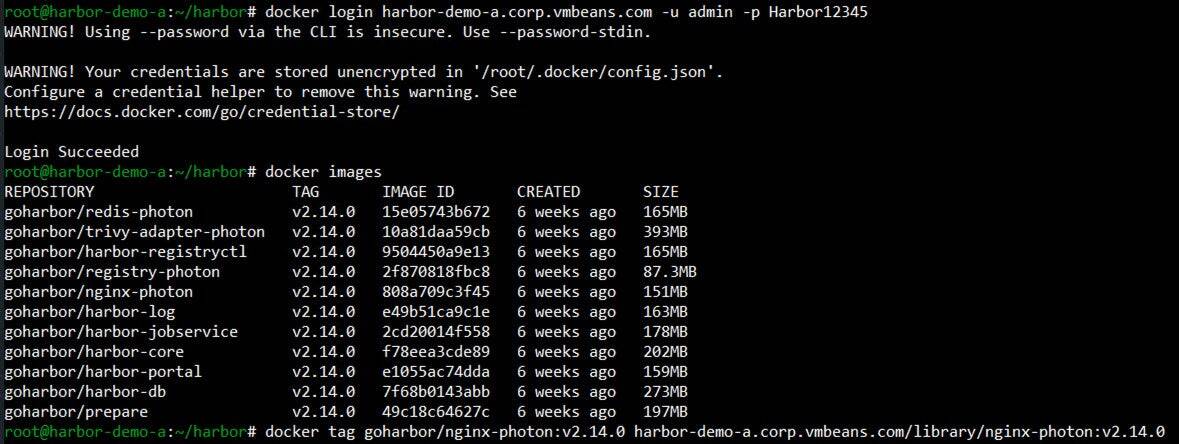
To begin, we must log in to Harbor using Docker CLI.
docker login harbor.yourdomain.com -u <username> -p <password>
We use an existing Docker image that got pulled when deploying Harbor and tag it to the new Harbor registry:
docker tag SOURCE_IMAGE[:TAG] harbor.yourdomain.com/library/REPOSITORY[:TAG]
docker push harbor.yourdomain.com/library/REPOSITORY[:TAG]

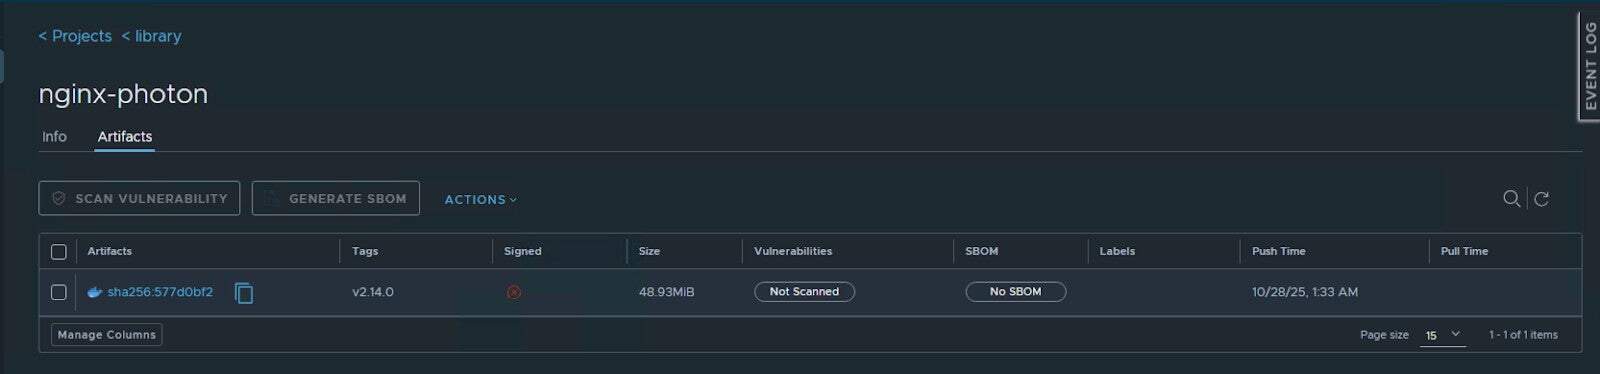
If you navigate back into the Harbor UI, we can see the nginx image is available in Harbor and can be used by developers in the organization to deploy nginx.
Conclusion
Harbor’s CNCF graduation underscores the maturity and transparency that enterprises expect from open-source infrastructure, with ongoing innovations like OCI artifact support, SBOM management, and CI/CD integrations. Learn more by joining the community on GitHub.