minikube provides a local Kubernetes cluster on macOS, Linux, and Windows. minikube’s primary goals are to be the best tool for local Kubernetes application development and to support all Kubernetes features that fit into that environment. It runs as a container, inside a VM, and on Linux, it can also be deployed directly, i.e., bare-metal. The container-based and VM-based deployments for either operating system have multiple choices. You can see the entire list of options on the minikube Drivers documentation page. In this post, I’ll show you how to install and run Minikube with Podman on an ARM-based MacBook. Note that the Podman driver is still in the experimental stage at the time of writing this blog post.
Installing Podman
Because I’m using Podman, having Podman installed and a Podman machine running on your Mac is a prerequisite. Thanks to Homebrew (The Missing Package Manager for macOS), installing Podman (and minikube) is easier than ever before. A brew install podman will do:
gvenzl@gvenzl-mac ~ % brew install podman
==> Downloading https://ghcr.io/v2/homebrew/core/podman/manifests/5.4.0
Already downloaded: /Users/gvenzl/Library/Caches/Homebrew/downloads/ec2ed8ba7b7cc27d27dc15f5ac0c4661b7ffb9d5debdcdafa267a209cc0081e3--podman-5.4.0.bottle_manifest.json
==> Fetching podman
==> Downloading https://ghcr.io/v2/homebrew/core/podman/blobs/sha256:8000fe73e511908388ca85e95fdddcb69bca121ef920aaf922fac46e8167afaf
####################################################################################################################################################### 100.0%
==> Pouring podman--5.4.0.arm64_sonoma.bottle.tar.gz
==> Caveats
In order to run containers locally, podman depends on a Linux kernel. One can be started manually using `podman machine` from this package. To start a podman VM automatically at login, also install the cask “podman-desktop.”
zsh completions have been installed to:
  /opt/homebrew/share/zsh/site-functions
==> Summary
🍺  /opt/homebrew/Cellar/podman/5.4.0: 201 files, 78.3MB
==> Running `brew cleanup podman`...
Disable this behaviour by setting HOMEBREW_NO_INSTALL_CLEANUP.
Hide these hints with HOMEBREW_NO_ENV_HINTS (see `man brew`).
gvenzl@gvenzl-mac ~ %
Next, a Podman machine needs to be created and started. Podman machine is essentially a tiny VM running on your Mac with a Podman environment inside it. The machine can be initialized with the podman machine init command and started with the podman machine start command. The init command takes additional parameters that specify, among others, CPUs, memory and the VM disk size assigned to the VM. Pick some values that are appropriate for your Laptop (for me, I decided on 4 CPUs, 4GB RAM and 25GB disk size) and issue the following command:
gvenzl@gvenzl-mac ~ % podman machine init --cpus 4 --memory 4096 --disk-size 25
Looking up Podman Machine image at quay.io/podman/machine-os:5.4 to create VM
Getting image source signatures
Copying blob a5202b5e26ab done   |
Copying config 44136fa355 done   |
Writing manifest to image destination
a5202b5e26abdb846baed95761c47a42c5d49529752fa6fba45ea7a5ea046b52
Extracting compressed file: podman-machine-default-arm64.raw: done
Machine init complete
To start your machine run:

    podman machine start

gvenzl@gvenzl-mac ~ %
Starting Podman machine
To start the machine, as the output of the podman machine init command tells you, issue the podman machine start command. You must run this command once every time you start your Mac unless you use something like Podman Desktop instead. Podman machine can either run rootful (with root permissions) or rootless (the default). I recommend always running with rootless first unless you have a really good reason not to. Why? Because of basic security. If you run rootful, your containers (and minikube environment) will run with root privileges and although that might not be a big deal with your Mac’s Podman machine VM, it may be in production:
gvenzl@gvenzl-mac ~ % podman machine start
Starting machine "podman-machine-default"
This machine is currently configured in rootless mode. If your containers require root permissions (e.g. ports < 1024), or if you run into compatibility issues with non-podman clients, you can switch using the following command:
podman machine set --rootful

API forwarding listening on: /var/folders/t_/jtt4g5455pn3cbmxcjj4nszw0000gn/T/podman/podman-machine-default-api.sock
The system helper service is not installed; the default Docker API socket address can’t be used by podman. If you would like to install it, run the following commands:
        sudo /opt/homebrew/Cellar/podman/5.4.0/bin/podman-mac-helper install
        podman machine stop; podman machine start
You can still connect Docker API clients by setting DOCKER_HOST using thefollowing command in your terminal session:
        export DOCKER_HOST='unix:///var/folders/t_/jtt4g5455pn3cbmxcjj4nszw0000gn/T/podman/podman-machine-default-api.sock'

Machine "podman-machine-default" started successfully
gvenzl@gvenzl-mac ~ %
Last but not least, you can inquire about the state of your Podman machine with podman machine ls:
gvenzl@gvenzl-mac ~ % podman machine ls
NAME                 	VM TYPE 	CREATED     	LAST UP        	CPUS    	MEMORY  	DISK SIZE
podman-machine-default*  applehv 	32 seconds ago  Currently running  4       	4GiB    	25GiB
gvenzl@gvenzl-mac ~ %
Installing minikube
Just like Podman, minikube is also available via Homebrew. Just run brew install minikube:
gvenzl@gvenzl-mac ~ % brew install minikube
==> Downloading https://formulae.brew.sh/api/formula.jws.json
==> Downloading https://formulae.brew.sh/api/cask.jws.json
==> Downloading https://ghcr.io/v2/homebrew/core/minikube/manifests/1.35.0
Already downloaded: /Users/gvenzl/Library/Caches/Homebrew/downloads/d45c630cc9dec65c97d897010d979d5c0c105ab7c4d983e27f33ee86a7ff62aa--minikube-1.35.0.bottle_manifest.json
==> Fetching minikube
==> Downloading https://ghcr.io/v2/homebrew/core/minikube/blobs/sha256:5736711e2
Already downloaded: /Users/gvenzl/Library/Caches/Homebrew/downloads/28a4e66e37ea4fae2794d9f8156d07f283ecc40d27cc6a4fbba9edb260e5158f--minikube--1.35.0.arm64_sonoma.bottle.tar.gz
==> Pouring minikube--1.35.0.arm64_sonoma.bottle.tar.gz
==> Caveats
zsh completions have been installed to:
  /opt/homebrew/share/zsh/site-functions
==> Summary
🍺  /opt/homebrew/Cellar/minikube/1.35.0: 10 files, 118.2MB
==> Running `brew cleanup minikube`...
Disable this behaviour by setting HOMEBREW_NO_INSTALL_CLEANUP.
Hide these hints with HOMEBREW_NO_ENV_HINTS (see `man brew`).
gvenzl@gvenzl-mac ~ %
Starting minikube
Before starting the minikube environment, ensure that you have a Podman machine running.The first step is to tell minikube that you are using a rootless Podman machine, which is done via minikube config set rootless true. You will not see any output from that command:
gvenzl@gvenzl-mac ~ % minikube config set rootless true
gvenzl@gvenzl-mac ~ %
The second step is to start minikube via:
 minikube start --driver=podman --container-runtime=containerd

gvenzl@gvenzl-mac ~ % minikube start --driver=podman --container-runtime=containerd
😄  minikube v1.35.0 on Darwin 15.3.1 (arm64)
    ▪ MINIKUBE_ROOTLESS=true
✨  Using the podman (experimental) driver based on user configuration
📌  Using rootless Podman driver
👍  Starting "minikube" primary control-plane node in "minikube" cluster
🚜  Pulling base image v0.0.46 ...
💾  Downloading Kubernetes v1.32.0 preload ...
    > preloaded-images-k8s-v18-v1...:  357.10 MiB / 357.10 MiB  100.00% 18.54 M
    > gcr.io/k8s-minikube/kicbase...:  452.84 MiB / 452.84 MiB  100.00% 23.24 M
E0305 18:03:24.209927   24330 cache.go:222] Error downloading kic artifacts:  not yet implemented, see issue #8426
🔥  Creating podman container (CPUs=2, Memory=3846MB) ...
📦  Preparing Kubernetes v1.32.0 on containerd 1.7.24 ...
    ▪ Generating certificates and keys ...
    ▪ Booting up control plane ...
    ▪ Configuring RBAC rules ...
🔗  Configuring CNI (Container Networking Interface) ...
🔎  Verifying Kubernetes components...
    ▪ Using image gcr.io/k8s-minikube/storage-provisioner:v5
🌟  Enabled addons: storage-provisioner, default-storageclass
🏄  Done! kubectl is now configured to use "minikube" cluster and "default" namespace by default
gvenzl@gvenzl-mac ~ %
Note: if you were to run the minikube start command without Podman machine running, you will see this error:
gvenzl@gvenzl-mac ~ % minikube start --driver=podman --container-runtime=cri-o
😄  minikube v1.35.0 on Darwin 14.7.1 (arm64)
✨  Using the podman (experimental) driver based on user configuration

💣  Exiting due to PROVIDER_PODMAN_NOT_RUNNING: "podman version --format <no value>" exit status 125: Cannot connect to Podman. Please verify your connection to the Linux system using `podman system connection list`, or try `podman machine init` and `podman machine start` to manage a new Linux VM
Error: unable to connect to Podman socket: failed to connect: dial tcp 127.0.0.1:58608: connect: connection refused
📘  Documentation: https://minikube.sigs.k8s.io/docs/drivers/podman/

gvenzl@gvenzl-mac ~ %
Using minikube
With minikube installed, you are now ready to go. Here are a couple of useful commands:
- To stop minikube, use: minikube stop
- To restart the existing minikube environment, use: minikube start
- To pause Kubernetes without impacting deployed apps, use: minikube pause
- To unpause a paused instance, use: minikube unpause
- To interact with minikube using kubectl:
- If you don’t have kubectl installed, use: minikube kubectl –, for example, minikube kubectl — get po -A to get all pods
- You may want to create a shortcut for minikube kubectl by creating an alias: alias kubectl=”minikube kubectl –“
- If you have kubectl installed, minikube will have configured kubectl to speak to the local cluster. You can see that actually in the last line of the minikube start … command output above
- To get the Kubernetes Dashboard up and running, use: minikube dashboard, the dashboard will be opened automatically in your default browser
Running your app on minikube
The minikube Get Started! page lists a handy demo app to deploy on your cluster, see section 4) Deploy applications. To test your minikube installation, you can spin up the echo-server application. Remember, you can shortcut minikube kubectl but for completeness, I’m using the full syntax.
Create a sample deployment and expose it on port 8080:
minikube kubectl -- create deployment hello-minikube --image=kicbase/echo-server:1.0
minikube kubectl -- expose deployment hello-minikube --type=NodePort --port=8080
It may take a moment for the deployment to deploy but eventually, it will show up when you run minikube kubectl — get services hello-minikube:
gvenzl@gvenzl-mac ~ % minikube kubectl -- get services hello-minikube
NAME         	TYPE   	CLUSTER-IP  	EXTERNAL-IP   PORT(S)      	AGE
hello-minikube   NodePort   10.104.20.158   <none>    	8080:31532/TCP   9s
gvenzl@gvenzl-mac ~ %
The app is now exposed inside the cluster via port 8080. To make it reachable to the outside world use, i.e., straight from your Mac, use port forwarding. For example, to forward the app to port 7081, use: minikube kubectl — port-forward service/hello-minikube 7080:8080
gvenzl@gvenzl-mac ~ % minikube kubectl -- port-forward service/hello-minikube 7080:8080
Forwarding from 127.0.0.1:7080 -> 8080
Forwarding from [::1]:7080 -> 8080
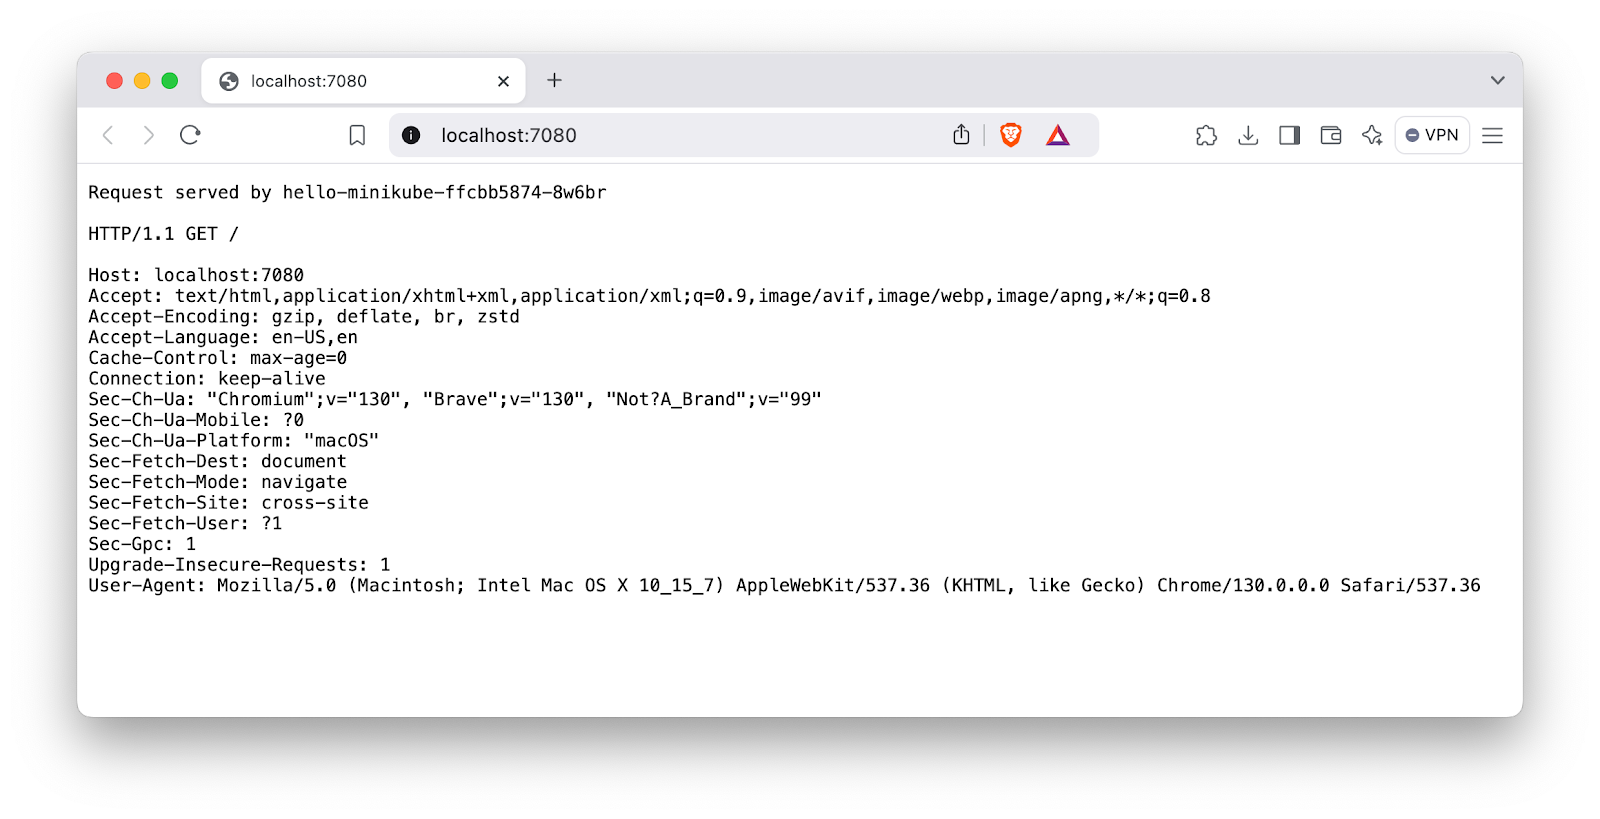
You can now access the app at http://localhost:7080/