

Ambassador post originally published on Medium by Yoshiyuki Tabata
The era of Web 3.0 is upon us, and with it might come a shift in how we manage our digital identities. Previously big platformers managed ID information and provided it to each service, but from now on, users manage it by themselves and provide whatever, wherever, and whenever they want. This is “Self-Sovereign Identity (SSI).”
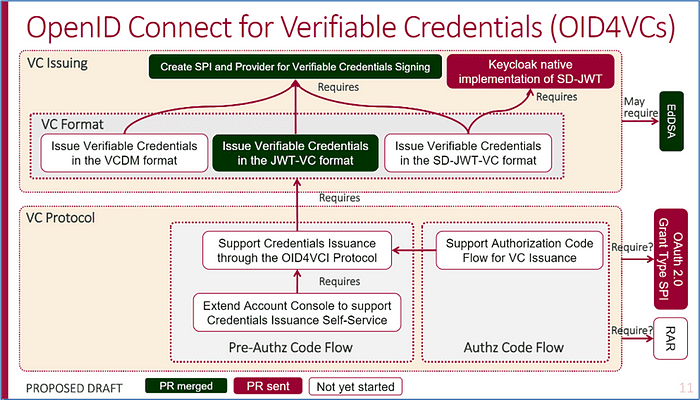
Currently, there are various standard specifications for SSI. Among them, “OpenID Connect for Verifiable Credentials Issuance (OID4VCI)”, which is a specification that extends OpenID Connect (OIDC) for a Verifiable Credential (VC, which is a credential interacted in SSI), has recently attracted attention due to its ease of acceptance from existing OAuth 2.0/OIDC deployments.
Keycloak, Identity and Access Management OSS, is working towards implementing OID4VCI, and it is attracting attention as a component that plays a central role in SSI because it is in the CNCF family and does not belong to a specific platformer.
This article provides how to issue a VC using Keycloak with a step-by-step.
Overview of a credential issuance flow
SSI is often described with a figure like the below: The three important roles are the “Issuer”, which issues VCs, the “Holder”, which manages issued VCs and self-sovereignly sends them as a VP (Verifiable Presentation), and the “Verifier”, which verifies the VP.

Here, we use Keycloak as the Issuer and focus on how to issue a credential.
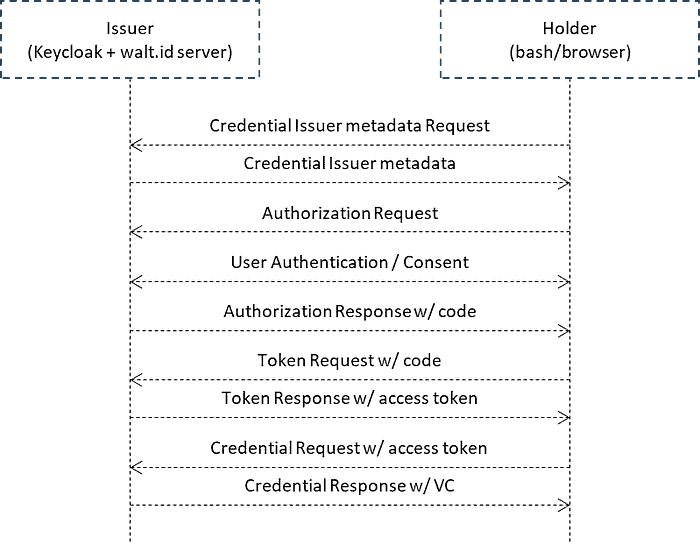
There are two credential issuance flows defined in OID4VCI, here we adapt Authorization Code Flow often used by OAuth 2.0/OIDC deployments.
Similar to the authorization code flow defined in RFC6749, after interacting with the authorization endpoint and the token endpoint, the access token obtained from the token endpoint is used to obtain a VC from the credential endpoint.
In the below tutorial, we combine Keycloak and walt.id server to act as the Issuer. We use the SSI Kit by walt.id published as OSS. Regarding the Holder, we use a bash or browser as appropriate to confirm that the Issuer can issue a VC.
Set up a tutorial environment
First, install walt.id server. Clone the GitHub repository.
git clone https://github.com/walt-id/waltid-ssikit.gitAfter building the project, create a DID for the walt.id server to work with Keycloak.
cd waltid-ssikit
./ssikit.sh build
./ssikit.sh did create
Make a note of the DID you created here, as you will need it when creating a Keycloak client for the walt.id server.
Then, import a VC template.
./ssikit.sh vc templates import - name Basic4Information basic4information.jsonThe VC template used here “basic4information.json” is like this.
{
  "type": [
    "Basic4Information",
    "VerifiableCredential"
  ],
  "@context": [
    "https://www.w3.org/2018/credentials/v1",
    {
      "Basic4Information": "https://example.org/basic4info/v1",
      "givenName": "https://schema.org/givenName",
      "familyName": "https://schema.org/familyName",
      "gender": "https://schema.org/gender",
      "address": "https://schema.org/address",
      "birthDate": "https://schema.org/birthdate"
    }
  ],
  "id": "https://issuer.oidp.uscis.gov/credentials/83627465",
  "issuer": "did:example:489398593",
  "issuanceDate": "2019–12–03T12:19:52Z",
  "expirationDate": "2029–12–03T12:19:52Z",
  "credentialSubject": {
    "id": "did:example:b34ca6cd37bbf23",
    "givenName": "TARO",
    "familyName": "YAMADA",
    "gender": "Male",
    "birthDate": "1980–01–01",
    "address": "Minato-ku Tokyo"
  }
}
After that, start the walt.id server.
./ssikit.sh serveNext, install Keycloak.
Download and unzip the Keycloak.wget https://github.com/keycloak/keycloak/releases/download/21.1.2/keycloak-21.1.2.tar.gz
tar zxvf keycloak-21.1.2.tar.gz
Install the Keycloak VC-Issuer plugin to enable Keycloak to work with walt.id server. Copy the jar file created in the target directory using the commands below to the Keycloak providers directory.
git clone -b authz-code-flow https://github.com/Hitachi/keycloak-vc-issuer.git
cd keycloak-vc-issuer
mvn clean package
After setting some environment variables, start Keycloak.
export VCISSUER_WALTID_ADDRESS=http://localhost
export VCISSUER_WALTID_CORE_PORT=7000
export VCISSUER_WALTID_SIGNATORY_PORT=7001
export KEYCLOAK_ADMIN=admin
export KEYCLOAK_ADMIN_PASSWORD=admin
./kc.sh start-dev
An Issuer DID is output to the Keycloak server log at startup, so make a note of it.
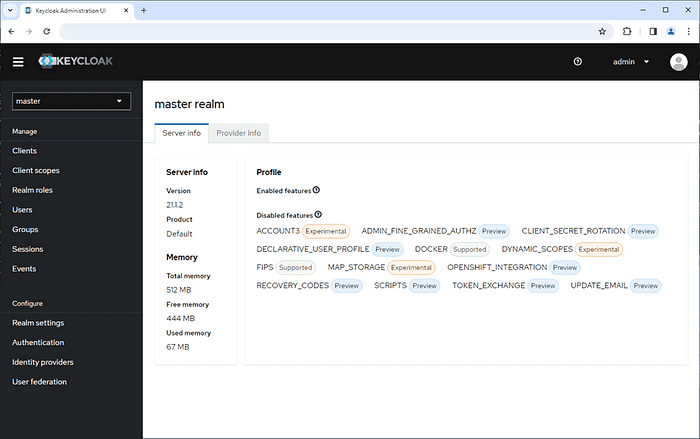
Access the 8080 port of the Keycloak host and log in to the admin console with the administrator username/password (admin/admin).
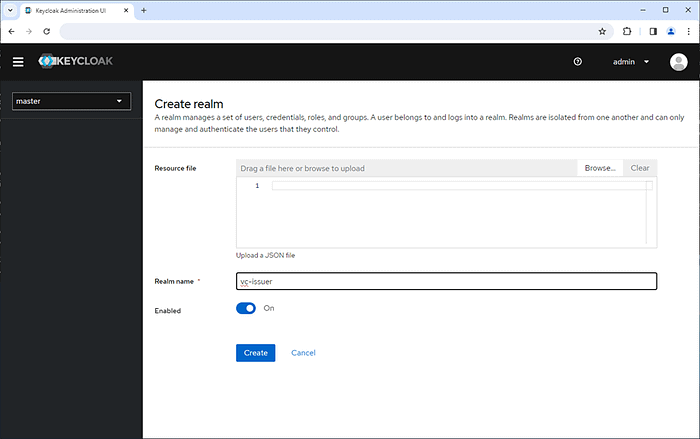
Create a realm “vc-issuer”.
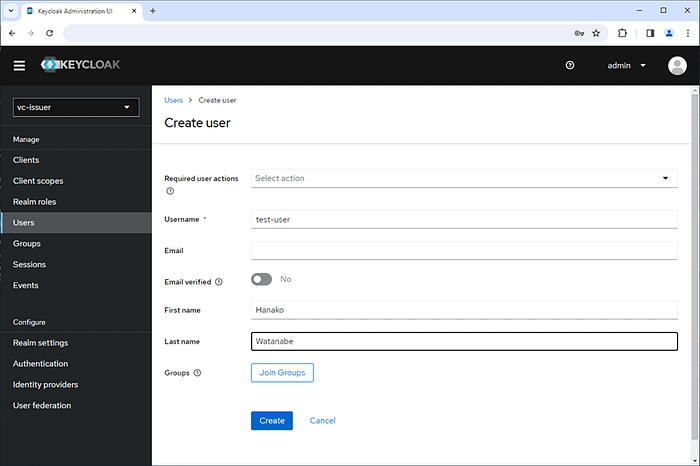
Create a user.
- Username: test-user
- First name: Hanako
- Last name: Watanabe
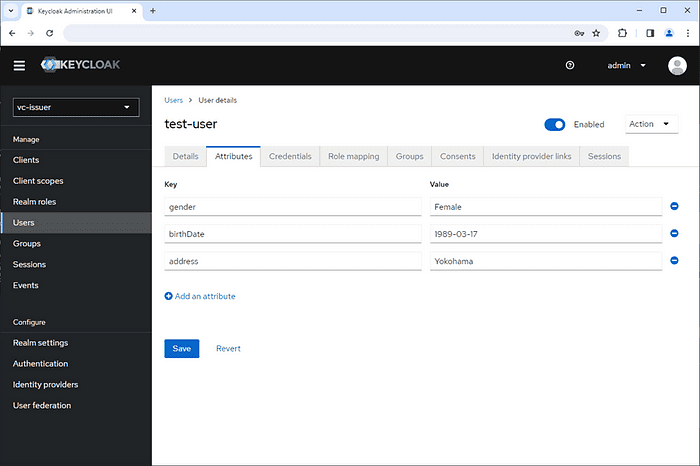
Set attributes for the user.
- gender: Female
- birthDate: 1989–03–17
- address: Yokohama
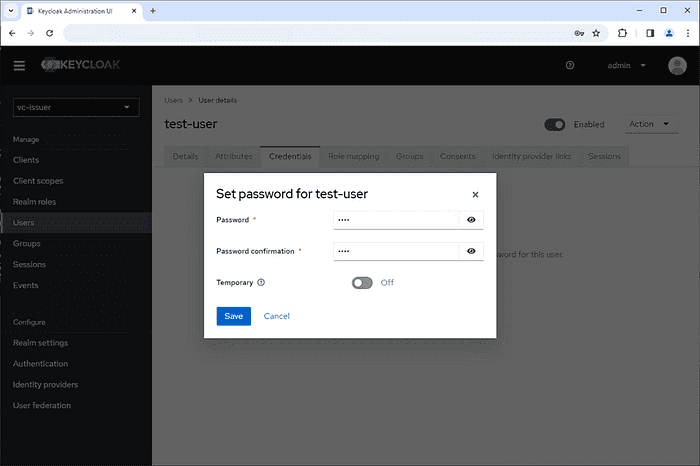
Set password for the user.
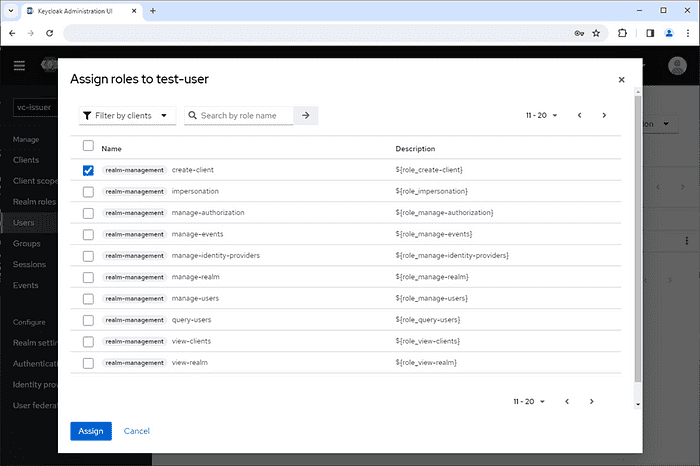
Assign the create-client role to the user. This role is only for creating a client for walt.id server.
Create a client for walt.id server using the curl commands.
token=$(curl http://localhost:8080/realms/vc-issuer/protocol/openid-connect/token -d "client_id=admin-cli&username=test-user&password=$password&grant_type=password" | jq -r '.access_token')
curl http://localhost:8080/realms/vc-issuer/clients-registrations/SIOP-2 -H "Content-Type:application/json" -H "Authorization: Bearer $token" -d @- <<EOS
{
  "name": "siop-client",
  "clientDid": "$client_did",
  "supportedVCTypes": [
    {
      "type": "Basic4Information",
      "format": "jwt_vc_json"
    }
  ],
  "description": "Client to receive Verifiable Credentials.",
  "expiryInMin": 3600,
  "additionalClaims": {
    "Basic4Information_claims": "givenName,familyName,gender,birthDate,address"
  }
}
EOS
Specify the user’s password for $password, and the client DID for the walt.id server for $client_did.
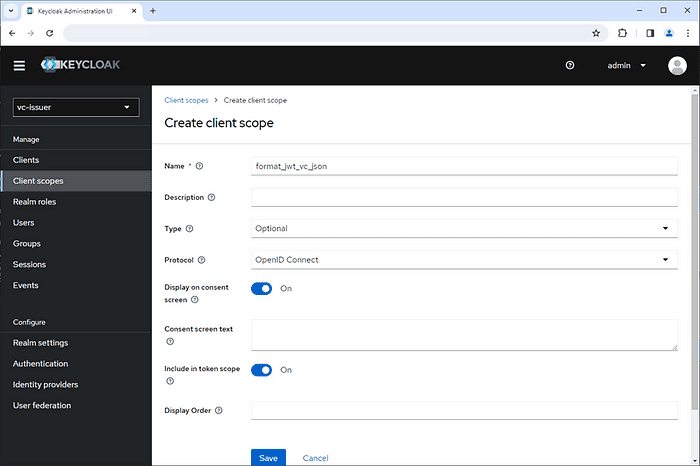
Create client scopes “format_jwt_vc_json” and “types_basic4information”.
- Name: format_jwt_vc_json
- Type: Optional
- Protocol: OpenID Connect
- Name: types_basic4information
- Type: Optional
- Protocol: OpenID Connect
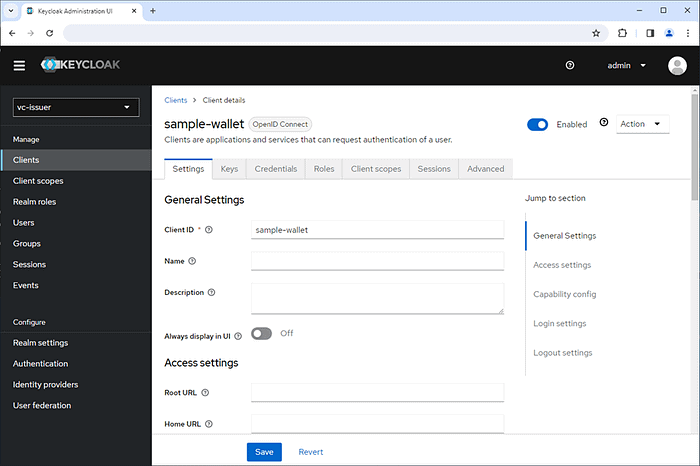
Create a client for the Holder “sample-wallet”.
- Client ID: sample-wallet
- Valid redirect URIs: https://localhost/cb
- Client authentication: On
- Authentication flow: Standard flow
- Client Authenticator: ClientId and Secret
- Client Secret: <automatically generated>
Issuing a VC
Let’s issue a VC along with the authorization code flow.
First, you request the credential issuer metadata using the curl command.
curl http://$keycloak_host:8080/realms/vc-issuer/verifiable-credential/$issuer_did/.well-known/openid-configurationSpecify the Keycloak hostname for $keycloak_host, and the issuer DID for $issuer_did.
You can receive the credential issuer metadata like this.
{
  "issuer": "http://sample.keycloak.server:8080/realms/vc-issuer",
  "authorization_endpoint": "http://sample.keycloak.server:8080/realms/vc-issuer/protocol/openid-connect/auth",
  "token_endpoint": "http://sample.keycloak.server:8080/realms/vc-issuer/verifiable-credential/did:key:xxxx/token",
  ...
  "credential_endpoint": "http://sample.keycloak.server:8080/realms/vc-issuer/verifiable-credential/did:key:xxxx/credential",
  "credential_issuer": {
    "display": [
      {
        "name": "Keycloak-Credentials Issuer - did:key:xxxx",
        "locale": "en_US"
      }
    ]
  },
  "credentials_supported": {
    "VerifiableCredential": {
      "formats": {
        "ldp_vc": {
          "types": []
        },
        "jwt_vc_json": {
          "types": [
            "Basic4Information"
          ]
        }
      },
      "display": [
        {
          "name": "Verifiable Credential"
        }
      ]
    }
  }
}
Now, you can see which endpoints you should call in subsequent procedures.
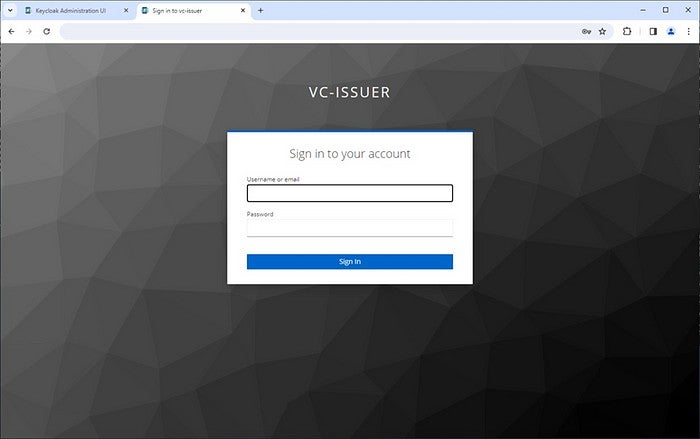
Second, you make an authorization request using the browser.
http://$keycloak_host:8080/realms/vc-issuer/protocol/openid-connect/auth?client_id=sample-wallet&redirect_uri=https://localhost/cb&state=abc&response_type=code&scope=openid format_jwt_vc_json types_basic4information&nonce=xyzThere are two possible ways to request the issuance of a specific credential type and credential format in an authorization request. One way is to use the authorization_details parameter defined in “OAuth 2.0 Rich Authorization Requests”, the other way is to use the scope parameter. Here, the latter one is used.
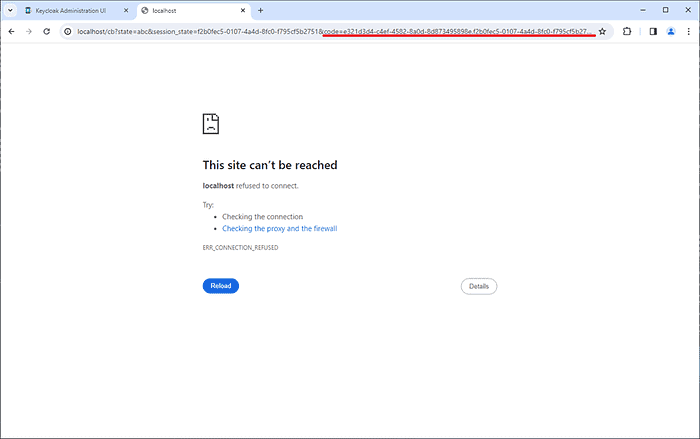
After accessing the above URL using the browser, the login screen is displayed.
After successful login, you can get an authorization code from the authorization response.
Third, you make a token request using the curl command.
curl http://$keycloak_host:8080/realms/vc-issuer/verifiable-credential/$issuer_did/token -H "Authorization: Basic $client_credential" -d "grant_type=authorization_code&code=$code&redirect_uri=https://localhost/cb"Specify the base64 encoded string including the client ID and the client secret, separated by a single colon (“:”) character for $client_credential, and the authorization code obtained from the authorization response for $code.
You can receive the token response like this.
{
  "access_token": "eyJhbG…",
  "token_type": "bearer",
  "expires_in": 300
}
Finally, you make a credential request using the curl command.curl
http://$keycloak_host:8080/realms/vc-issuer/verifiable-credential/$issuer_did/credential -H "Authorization: Bearer $token" -H "Content-Type: application/json" -d '{"format": "jwt_vc_json", "types": ["VerifiableCredential", "Basic4Information"]}'Specify the access token obtained from the token response for $token.
You can receive the credential response like this.
{
  "format": "jwt_vc_json",
  "credential": "eyJra…"
}
{
"sub": "75f81424–1b65–4fb0-a011–09c3da814831",
"nbf": 1708083637,
"iss": "did:key:xxxx",
"iat": 1708083637,
"vc": {
"type": [
"Basic4Information",
"VerifiableCredential"
],
"@context": [
"https://www.w3.org/2018/credentials/v1",
{
"Basic4Information": "https://example.org/basic4info/v1",
"givenName": "https://schema.org/givenName",
"familyName": "https://schema.org/familyName",
"gender": "https://schema.org/gender",
"address": "https://schema.org/address",
"birthDate": "https://schema.org/birthdate"
}
],
"id": "urn:uuid:ce7601a3–2079–4283-b519–5e9420ed3cbe",
"issuer": "did:key:xxxx",
"issuanceDate": "2024–02–16T11:40:37Z",
"issued": "2024–02–16T11:40:37Z",
"validFrom": "2024–02–16T11:40:37Z",
"expirationDate": "2029–12–03T12:19:52Z",
"credentialSubject": {
"id": "75f81424–1b65–4fb0-a011–09c3da814831",
"givenName": "Hanako",
"familyName": "Watanabe",
"gender": "Female",
"birthDate": "1989–03–17",
"address": "Yokohama"
}
},
"jti": "urn:uuid:ce7601a3–2079–4283-b519–5e9420ed3cbe"
}Conclusion
In this article, I explained how to issue a VC using Keycloak and walt.id server, but currently in the Keycloak community, OAuth-SIG (a group whose activity is mainly supporting OAuth/OIDC and its related security features to Keycloak) discusses how to issue a VC using only Keycloak and we are promoting implementation in order.
If you would like to know more about this Keycloak activity, please join the Keycloak maintainer Norimatsu’s session, The Leading Edge of AuthN and AuthZ by Keycloak, at KubeCon + CloudNativeCon Europe 2024 where he will explain this activity a little bit more.