
Community post originally published on Medium by Sagar Parmar

Introduction
Backstage is an open-source platform for constructing Internal Developer Portals (IDPs). Internal Developer Portals serve as a one-stop shop, that provides a unified view of all our resources. IDPs enable us to seamlessly create, manage, monitor, and document our software resources from a single location. The primary goal of the IDP is to eliminate the reliance on the connection between DevOps and developers.
Prerequisites
- Backstage is up and running. If you need assistance with deploying Backstage, please follow this getting started guide.
- Backstage integration with Github.
- A working Terraform code is uploaded on the GitHub repo.
- GitHub action file is created to execute the terraform code.
This blog assumes a working knowledge of Terraform and GitHub Actions. While we demonstrate using GitHub and AWS for the examples, feel free to utilize any CI/CD tool and cloud provider of your choice.
Templates
Backstage provides a software catalog used to manage all of our software resources, including CI-CD, Docs, API, K8s, Websites, microservices, etc. To create a new component(entity) in the software catalog we need Templates.
The structure of the template file is almost similar to the kubernetes manifests. This similarity in structure makes it easier for users familiar with Kubernetes to work with Backstage templates.
Below is a backstage template that you can use to create an EC2 instance on AWS.
apiVersion: scaffolder.backstage.io/v1beta3
kind: Template
metadata:
name: sagar
title: Backstage automation
description: creating ec2 using backstage and terraform.
spec:
owner: guest
type: service
parameters:
- title: backstage demo template
required:
- name
properties:
name:
type: stringsteps:
- id: test
name: backstage-blog
action: debug:log
input:
message: 'Hello, ${{ parameters.name }}!'output:
links:
- title: Open in catalog
icon: catalog
entityRef: ${{ steps['register'].output.entityRef }}- apiVersion: – is the required field and the latest value of the API version is `scaffolder.backstage.io/v1beta3`.
- Kind: – template is the entity in the backstage and to configure it, set the value of kind to Template.
- metadata: – Information you will add in metadata will appear on the template card.
- spec: – it contains the name of the owner/group of the template and the type of template it could be anything for example:- service/ website/app etc.
- parameters: – these are the list of options you can add to the template to get the information from the user. Parameters must contain these components: –
5.1. title: – contains the title of the template
5.2. required: – You can add the parameters which are mandatory for the template so that a user cannot skip it.
5.3. properties: – It is used to take input from the user. - steps: – Here we define actions taken by the template while executing the template.
- output: – This is the final section in the template file. After completing all the actions specified in the ‘steps,’ this part is executed. It is used to display the result of the template execution, although it is not mandatory.
You can find out more about the template format here.
Deploying Custom Template
Now let’s see the files which we have created for the demo. In my backstage code, I have created a directory ec2-demo/template inside the template directory I have created a template.yaml file. Also, I have created a content directory where I have created 2 files component-info.yaml , index.jsonand package.json .
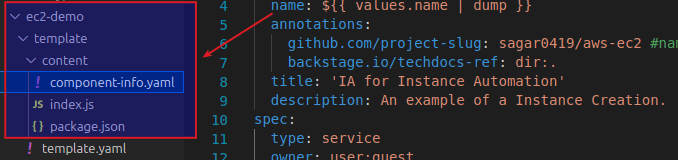
I have added component-info.yaml , index.json and package.json file below. In the component-info.yaml file I have given the reference of the GitHub repo where my Terraform workflow is present.
apiVersion: scaffolder.backstage.io/v1beta3
kind: Template
metadata:
name: create-ec2-instance
title: Create an EC2 Instance
description: Create an Instance to deploy your application
tags: ['recommended']
spec:
owner: guests
type: service
parameters:
- title: EC2 Instance Creation
required:
- InstanceName
- Region
- InstanceType
properties:
InstanceName:
title: Instance Name.
type: string
description: Name of the Instnace to be created.
ui:autofocus: true
ui:options:
rows: 5
Region:
title: AWS Region
type: string
description: Name of the region where you want to create your create-ec2-instance eg:- us-east-1, ap-south-1 etc.
InstanceType:
title: Type of Instance.
type: string
description: Type of the instance that you want to deploy, for eg:- t2.medium, t3.medium etc.
enum:
- t2.medium
- t2.small
- t2.micro
- t3.medium
action:
title: action
type: string
description: What action do you want to perform? Create or delete?
enum:
- apply
- destroy
- title: Choose a Repository Location
required:
- repoUrl
properties:
repoUrl:
title: Location of the repository
type: string
ui:field: RepoUrlPicker
ui:options:
allowedHosts:
- github.com
steps:
# Getting the all the files/details from the template
- id: fetch-base
name: Fetching Details from content folder
action: fetch:template
input:
url: ./content # Location of the content directory where catlog-info.yaml file is present for the template
values:
name: ${{ parameters.InstanceName}}
# Publish the content of the current working directory to our github directory
- id: publish
name: Publishing Details
action: publish:github
input:
allowedHosts: ['github.com']
description: This repo is to create an ec2 instance ${{ parameters.InstanceName }} using backstage.
repoUrl: ${{ parameters.repoUrl }}
repoVisibility: public # or 'internal' or 'private'
# defaultBranch: master
# Triggering CI-CD to create resource in our case github action.
- id: github-action
name: Starting GitHub action
action: github:actions:dispatch
input:
workflowId: instance.yml # ID of GitHub action WorkFlow
repoUrl: 'github.com?repo=aws-ec2&owner=sagar0419'
branchOrTagName: 'master'
workflowInputs:
instanceName: ${{ parameters.InstanceName }}
awsRegion: ${{ parameters.Region }}
instanceType: ${{ parameters.InstanceType }}
action: ${{ parameters.action }}
# Registering new component in the catalog of backstage.
- id: register
name: Registering the new Component
action: catalog:register
input:
repoContentsUrl: ${{steps['publish'].output.repoContentsUrl }}
catalogInfoPath: '/component-info.yaml' # where the info of the catalog is stored.
# Output links are displayed to the user after the template execution.
output:
links:
- title: Repository
url: ${{ steps['publish'].output.remoteUrl }}
- title: Open in catalog
icon: catalog
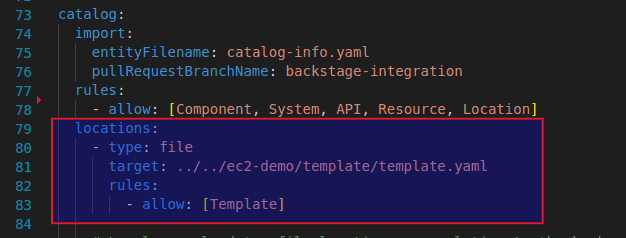
entityRef: ${{ steps['register'].output.entityRef }}After adding all these files, navigate to your app-config.yaml file and insert the template path under the catalogsection, as illustrated in the screenshot below. Adjust the target path according to your requirements.
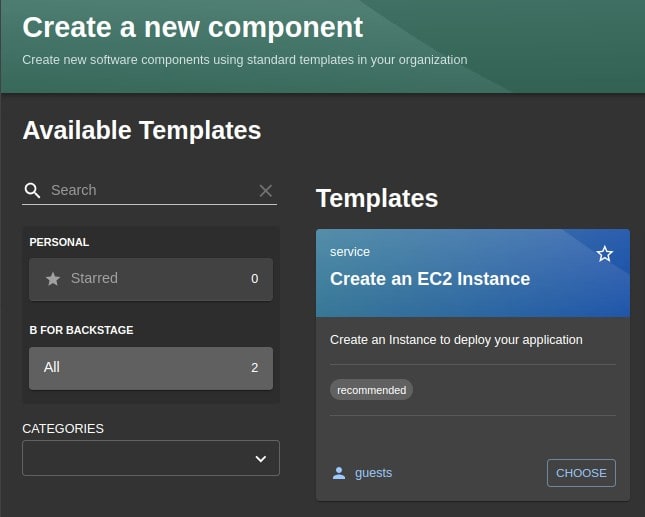
After adding the path, execute the yarn dev command. Now, on the Backstage portal, under the Create option, you will notice the newly created template.
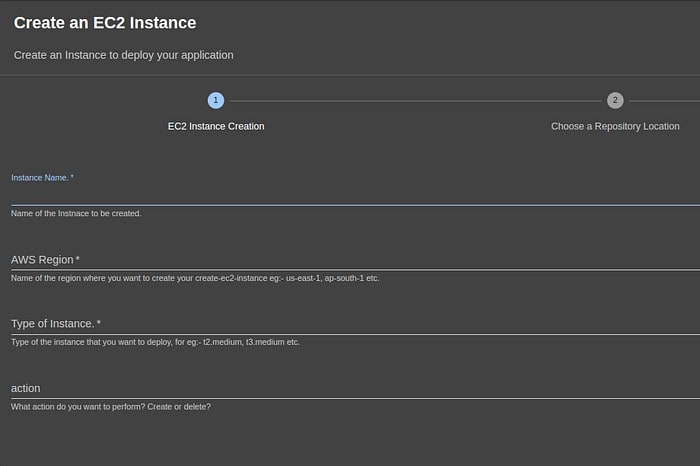
In the template.yaml file, Under the parameter I have added instanceName, region and instanceType. Once you open the ec2-template it will ask you to add these values.
After adding the values on the next page it will ask you to add a repository name and owner. You can give any name to the repo, whatever name you add here the template will create a repo on GitHub with that name. The owner can be a backstage group or users.

Once all the details are filled, the template will ask you to verify the details which you have added.
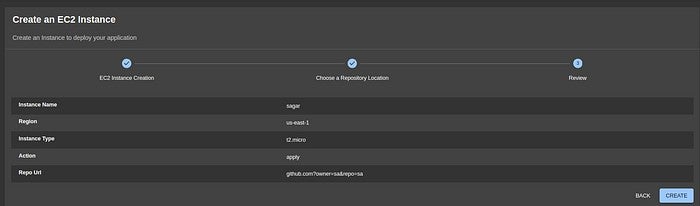
After reviewing, click on ‘Create.’ It will take a couple of seconds to generate your catalog. In the background, Backstage will trigger the GitHub workflow. This workflow will execute the ‘terraform apply’ command, which will then create an EC2 instance. Below is the screenshot of the GitHub action.

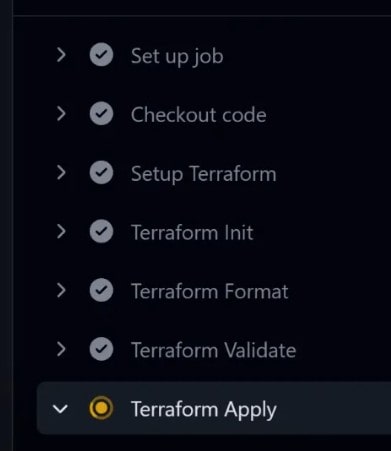
If you check the status of the GitHub action Job you will see the status of the current job and its progress.
Coming back to backstage UI, here you will see that your catalog has been created.
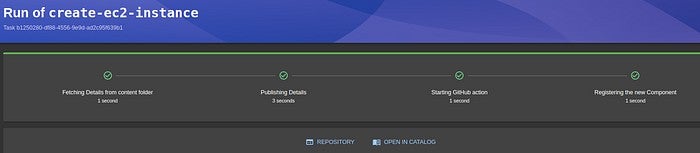
Once done you can click on the catalog link. It will take you to the newly created catalog window.
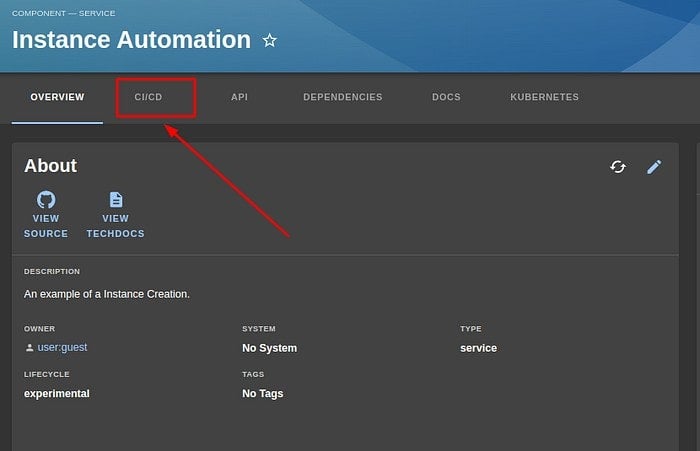
Here you will see a CI-CD option under that option you can check the status/progress of the GitHub workflow job.
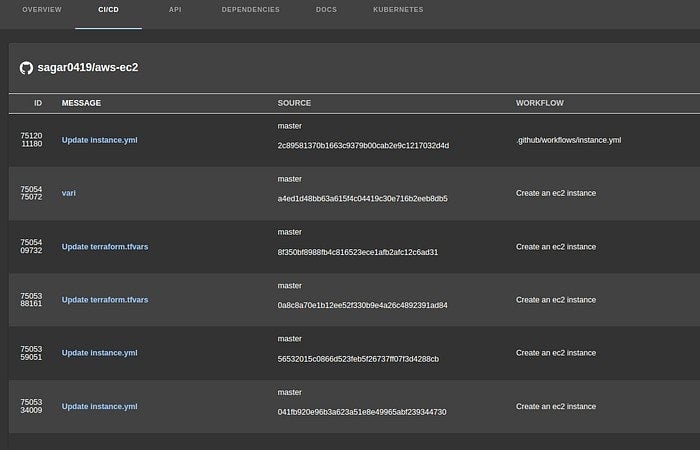
Once the pipeline is completed your ec2 instance will be up and running.
Summary
In this blog post, we have seen how we can use the backstage template to create an AWS EC2 instance. You can also use the template to spin Infra anywhere, to create a CI-CD Pipeline to deploy your application etc.
I hope you found this post informative and engaging. I would love to hear your thoughts on this post, so do start a conversation on Twitter or LinkedIn.