


Guest post by Vivian Hu and Michael Yuan from Second State with the help from Chen Jin from the OpenYurt project.
Edge computing is a distributed application architecture that places computational resources (eg, CPU and storage) close to the source of the data. By doing so, it offers the advantages of low latency, high performance, and security for a wide range of applications.
However, similar to cloud computing in data centers, edge computing also faces challenges such as distribution, management, and orchestration of workloads across heterogeneous devices and networks. Container-based solutions have become popular choices among developers to address those challenges in the cloud. As a result, developers are now bringing such solutions, such as Kubernetes (k8s) and containers, to edge computing. Unfortunately, neither k8s nor Linux containers are designed for edge computing.
Potential issues with standard k8s on edge include the following.
- Edge devices have limited computing, storage, and networking resources. Running a full K8s node is often too resource-consuming on edge devices.
- K8s only manages devices with public IP addresses. Yet, many edge devices don’t expose public IPs.
- Edge devices are often offline, while the standard k8s requires its pods to be connected at all times.
- Edge devices are often connected via non-TCP networks and require specialized network interfaces to communicate with their k8s managers.
As a result, developers have created specialized Kubernetes distributions for edge computing. A leading edge-optimized k8s distribution is OpenYurt. Originally created by Alibaba, OpenYurt is a CNCF Sandbox project. It is an open platform that embraces the powerful orchestration capabilities of upstream Kubernetes. As a result, users can deliver, manage and monitor edge workloads using the same upstream Kubernetes APIs.
Even with an edge-optimized k8s distribution like OpenYurt, the standard Linux containers are still too heavy to run the edge workloads on small devices. The footprint of a typical Linux container image is often in the GBs, and it takes seconds to start with a full CPU. Considering the simplicity of a typical edge application, the Linux container takes too much storage, CPU, and battery resources on a constrained device. Furthermore, Linux container apps are not portable and not secure on edge devices.
OCI-compliant and k8s compatible lightweight WebAssembly runtimes like WasmEdge is a much better alternative to Linux containers for containerized apps on edge. WasmEdge provides capability-based secure sandboxes, makes a very little assumption about the underlying OS services, and at the same time, supports multiple programming languages on the front end. Besides Linux, macOS, Windows, WasmEdge could even run on RTOS like Linux Foundation’s seL4.
The OpenYurt and WasmEdge teams worked together to showcase how to use OpenYurt to manage WasmEdge apps in an edge cluster. OpenYurt and WasmEdge could finally bring the cloud-native containerized applications to edge computing! Let’s get started!
Use OpenYurt to Manage WasmEdge
OpenYurt uses a centralized Kubernetes control plane to manage multiple edge nodes in a cloud server. In addition, it extends upstream Kubernetes to the edge. In this demo, we will set up two machines. One is called Master, running K8s. The other one is called Node, running OpenYurt.

The overall workflow is illustrated in the following figure.

In the rest of this article, we will cover the steps to install and set up the entire toolchain for running a WasmEdge application in OpenYurt.
Before we start
Close the swap space of the master and node firstly.
sudo swapoff -a
//verify
free -m


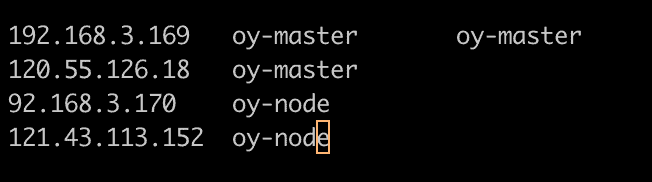
Next, let’s configure node/etc/hosts.
Then, load the br_netfilter Kernel module and modify the Kernel parameter.
//load the module
sudo modprobe br_netfilter
//verify
lsmod | grep br_netfilter
// create k8s.conf
cat <<EOF | sudo tee /etc/sysctl.d/k8s.conf
net.bridge.bridge-nf-call-ip6tables = 1
net.bridge.bridge-nf-call-iptables = 1
EOF
sudo sysctl --system
Last, setup the value of rp-filter – adjusting the value of two parameters in /etc/sysctl.d/10-network-security.conf from 2 to 1 and setting up the value of /proc/sys/net/ipv4/ip_forward to 1.
sudo vi /etc/sysctl.d/10-network-security.confecho 1 > /proc/sys/net/ipv4/ip_forward
sudo sysctl --system
Install containerd
Use the following commands to install containerd on your edge node.
export VERSION="1.5.7"
echo -e "Version: $VERSION"
echo -e "Installing libseccomp2 ..."
sudo apt install -y libseccomp2
echo -e "Installing wget"
sudo apt install -y wget

wget https://github.com/containerd/containerd/releases/download/v${VERSION}/cri-containerd-cni-${VERSION}-linux-amd64.tar.gz
wget https://github.com/containerd/containerd/releases/download/v${VERSION}/cri-containerd-cni-${VERSION}-linux-amd64.tar.gz.sha256sum
sha256sum --check cri-containerd-cni-${VERSION}-linux-amd64.tar.gz.sha256sum

sudo tar --no-overwrite-dir -C / -xzf cri-containerd-cni-${VERSION}-linux-amd64.tar.gz
sudo systemctl daemon-reload
As the crun project support WasmEdge as default, we just need to configure the containerd configuration for runc. So we need to modify the runc parameters in /etc/containerd/config.toml to curn and add pod_annotation.
sudo mkdir -p /etc/containerd/
sudo bash -c "containerd config default > /etc/containerd/config.toml"
wget https://raw.githubusercontent.com/second-state/wasmedge-containers-examples/main/containerd/containerd_config.diff
sudo patch -d/ -p0 < containerd_config.diff
After that, restart containerd to make the configuration take effect.
systemctl start containerd
Install WasmEdge
Use the simple install script to install WasmEdge on your edge node.
curl -sSf https://raw.githubusercontent.com/WasmEdge/WasmEdge/master/utils/install.sh | bash
Build and install crun
We need a crun binary that supports WasmEdge on the edge node. For now, the most straightforward approach is to build it yourself from the source. First, let’s ensure that crun dependencies are installed on your Ubuntu 20.04. For other Linux distributions, please see here.
sudo apt update
sudo apt install -y make git gcc build-essential pkgconf libtool \
  libsystemd-dev libprotobuf-c-dev libcap-dev libseccomp-dev libyajl-dev \
  go-md2man libtool autoconf python3 automake
Next, configure, build, and install a crun binary with WasmEdge support.
git clone https://github.com/containers/crun
cd crun
./autogen.sh
./configure --with-wasmedge
make
sudo make install
Install OpenYurt
Now, we can install OpenYurt on the edge node to control the containerd, crun, and wasmedge stack underneath it.
The easiest way to build an OpenYrut Cluster is to go to the OpenYurt Experience Center. All you need to do is sign up for an account for testing, and then you will get an OpenYurt cluster. Next, you could use yurtctl join command line to join an edge node. See more details here.
Alternatively, you can build an OpenYurt cluster from scratch according to the following guide.
Install yurtctl
Use the following command line to install yurtctl. The yurtcli CLI tool help install/uninstall OpenYurt and also convert a standard Kubernetes cluster to an OpenYurt cluster.
git clone https://github.com/openyurtio/openyurt.git
cd openyurt
make build WHAT=cmd/yurtctl
Install OpenYurt components
OpenYurt includes several components. YurtHub is the traffic proxy between the components on the node and Kube-apiserver. The YurtHub on tedge will cache the data returned from the cloud. Yurt controller supplements the upstream node controller to support edge computing requirements. TunnelServe’r connects with the TunnelAgent` daemon running in each edge node via a reverse proxy to establish secure network access between the cloud site control plane and the edge nodes that are connected to the intranet. For more detailed information, you could refer to the OpenYurt docs.
yurtctl convert --deploy-yurttunnel --cloud-nodes oy-master --provider kubeadm\
--yurt-controller-manager-image="openyurt/yurt-controller-manager:v0.5.0"\
--yurt-tunnel-agent-image="openyurt/yurt-tunnel-agent:v0.5.0"\
--yurt-tunnel-server-image="openyurt/yurt-tunnel-server:v0.5.0"\
--node-servant-image="openyurt/node-servant:latest"\
--yurthub-image="openyurt/yurthub:v0.5.0"
We need to change the openyurt/node-server-version to latest here: –node-servant-image=”openyurt/node-servant:latest”\
Install K8s
Finally, on the master node, we will install and start a k8s controller. We configure it to join the OpenYurt node upon starting up.
$ sudo apt-get update && sudo apt-get install -y ca-certificates curl software-properties-common apt-transport-https
// add K8s source
$ curl -s https://mirrors.aliyun.com/kubernetes/apt/doc/apt-key.gpg | sudo apt-key add -
$ sudo tee /etc/apt/sources.list.d/kubernetes.list <<EOF
$ deb https://mirrors.aliyun.com/kubernetes/apt/ kubernetes-xenial main
// install K8s compoents 1.18.9
$ sudo apt-get update && sudo apt-get install -y kubelet=1.18.9-00 kubeadm=1.18.9-00 kubectl=1.18.9-00
// Initialize the master node
$ sudo kubeadm init --pod-network-cidr 172.16.0.0/16 \
--apiserver-advertise-address=192.168.3.167 \
--image-repository registry.cn-hangzhou.aliyuncs.com/google_containers
// join the work node
$ kubeadm join 192.168.3.167:6443 --token 3zefbt.99e6denc1cxpk9fg \
  --discovery-token-ca-cert-hash sha256:8077d4e7dd6eee64a999d56866ae4336073ed5ffc3f23281d757276b08b9b195
Run a simple WebAssembly app
Next, let’s run a WebAssembly program through the Kubernetes cluster as a container in the pod. This section will start off pulling this WebAssembly-based container image from Docker hub. If you want to learn how to compile, package, and publish the WebAssembly program as a container image to Docker hub, please refer to WasmEdge Book.
Enter the following commands from another terminal window in the master node, and start using the cluster.
root@master:~# kubectl cluster-info
Kubernetes master is running at https://192.168.3.167:6443
KubeDNS is running at https://192.168.3.167:6443/api/v1/namespaces/kube-system/services/kube-dns:dns/proxy
To further debug and diagnose cluster problems, use kubectl cluster-info dump.
Because the kubectl 1.18.9 missed annotations parameters, we need to adjust the command line here. If you are using OpenYurt Experience Center with OpenYurt 0.6.0 and Kubernetes 1.20.11 by default, please refer to the Kubernetes sections in the WasmEdge book to run the wasm app.
// kubectl 1.18.9$ sudo kubectl run -it --rm --restart=Never wasi-demo --image=hydai/wasm-wasi-example:with-wasm-annotation --overrides='{"kind":"Pod","metadata":{"annotations":{"module.wasm.image/variant":"compat"}} , "apiVersion":"v1", "spec": {"hostNetwork": true}}' /wasi_example_main.wasm 50000000
// kubectl 1.20.11$ sudo kubectl run -it --rm --restart=Never wasi-demo --image=hydai/wasm-wasi-example:with-wasm-annotation --annotations="module.wasm.image/variant=compat" --overrides='{"kind":"Pod", "apiVersion":"v1", "spec": {"hostNetwork": true}}' /wasi_example_main.wasm 50000000
The output from the containerized application is printed into the console. It is the same for all Kubernetes versions.
Random number: 1123434661
Random bytes: [25, 169, 202, 211, 22, 29, 128, 133, 168, 185, 114, 161, 48, 154, 56, 54, 99, 5, 229, 161, 225, 47, 85, 133, 90, 61, 156, 86, 3, 14, 10, 69, 185, 225, 226, 181, 141, 67, 44, 121, 157, 98, 247, 148, 201, 248, 236, 190, 217, 245, 131, 68, 124, 28, 193, 143, 215, 32, 184, 50, 71, 92, 148, 35, 180, 112, 125, 12, 152, 111, 32, 30, 86, 15, 107, 225, 39, 30, 178, 215, 182, 113, 216, 137, 98, 189, 72, 68, 107, 246, 108, 210, 148, 191, 28, 40, 233, 200, 222, 132, 247, 207, 239, 32, 79, 238, 18, 62, 67, 114, 186, 6, 212, 215, 31, 13, 53, 138, 97, 169, 28, 183, 235, 221, 218, 81, 84, 235]
Printed from wasi: This is from a main function
This is from a main function
The env vars are as follows.
The args are as follows.
/wasi_example_main.wasm
50000000
File content is This is in a file
pod "wasi-demo" deleted
You can now check out the pod status through the Kubernetes command line.
crictl ps -a
You can see the events from scheduling to running the WebAssembly workload in the log.
CONTAINER           IMAGE               CREATED             STATE               NAME                 ATTEMPT             POD ID
0c176ed65599a       0423b8eb71e31       8 seconds ago       Exited              wasi-demo
What’s next
WasmEdge and OpenYurt work together to bring the full benefits of Kubernetes to edge computing. In this example, we have demonstrated a very simple use case. We have just scratched the surface of what’s possible here. Please follow both projects on GitHub to stay updated on our collaboration, and if you have applications that could benefit from this approach, we’d love to hear about them too!
- WasmEdge GitHub repo: https://github.com/WasmEdge/WasmEdge
- OpenYurt GitHub repo: https://github.com/openyurtio/openyurt