
Guest post by Nimal Kunnath, Systems Reliability Engineer at Nutanix
Numerous reports have consistently shown that enterprises today embrace hybrid and multicloud as their preferred modes of IT infrastructure deployment. According to a survey done by IDG, more than half (55%) of organizations currently use multiple public clouds, with 21% saying they use three or more.
As developers are becoming acclimated to building and shipping containers, Kubernetes has clearly become the go-to choice for container orchestration. There are numerous reasons why an organization would deploy Kubernetes across multiple cloud vendors:
Cloud bursting
In a multicloud infrastructure, “bursting” involves using resources from one cloud to supplement the resources of another. If an organization using a private cloud reaches 100 percent of its resource capacity, the overflow traffic is directed to a public cloud to avoid any interruption of services.
Disaster recovery and backup
In practice, you do not want one cloud provider to be the single point of failure. By spreading recovery resources across clouds, you achieve greater resilience and availability than in a single cloud infrastructure.
With all of that infrastructure in place, it is very challenging for IT Operations teams to manage multiple clusters. The following challenges arise:
- To access the clusters, a huge number of kubectl and kubeconfig files need to be maintained. One would have to context-switch between them for different clusters/projects and the added complexity of differences in access methods across cloud providers can be cumbersome.
- While developers typically focus on writing code, today it is not uncommon for them to learn the operations side of applications. While Kubernetes is designed to help them ship and update applications much faster, it is complex by itself. Getting up to speed with concepts and accelerating their learning curve was desired, so that they focus on what matters: the application code.
- Troubleshooting in Kubernetes is not a trivial task. During the course of a debugging session, the admin would have to identify errors from pod logs and events, pod status, etc. A new admin could easily spend a lot of valuable time figuring out the correct commands and logs to check impacting the business adversely.
Kubernetes exposes a standard dashboard that provides an overview of applications running on your cluster, but this is done at the individual cluster level. It is desired to have a unified management solution that would address the challenges above. We will focus on the open-source solution Lens today.
Lens is a standalone application that is available on MacOS, Windows, and Linux, which means you don’t have to install any packages in the Kubernetes nodes themselves. The single IDE can be used to manage all your clusters on any platform just by importing the kubeconfig file. Let’s jump in and take a look.
Installing Lens
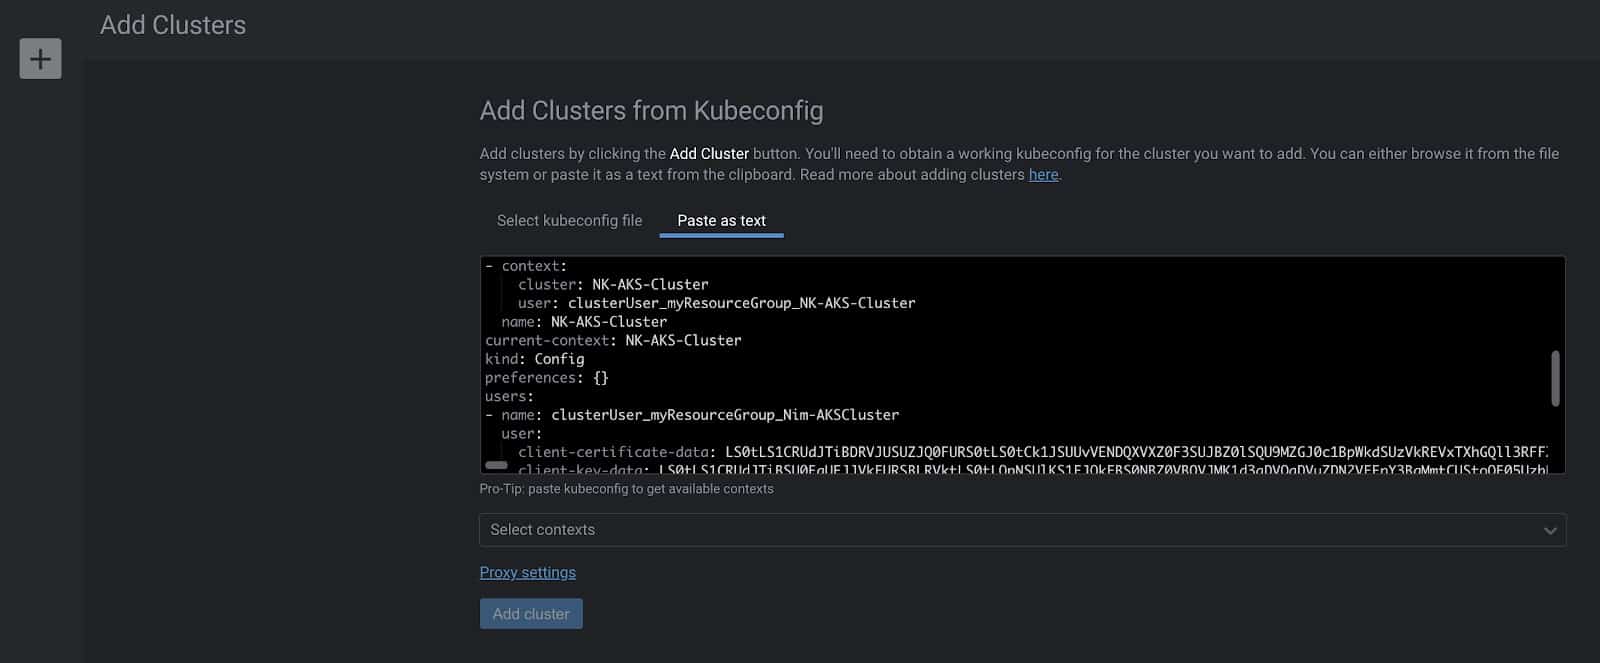
Navigate to the Lens webpage, download and install it for your preferred OS. Immediately after opening the application, hit the ‘+’ button to add your cluster. You could either import the kubeconfig file or paste it and voila! Let the magic begin.
I have deployed two clusters, one with Karbon (Nutanix’s Kubernetes Management Solution), on Nutanix private cloud, and the second one using Azure Kubernetes Service. Importing the kubeconfig file for the AKS cluster is shown below.
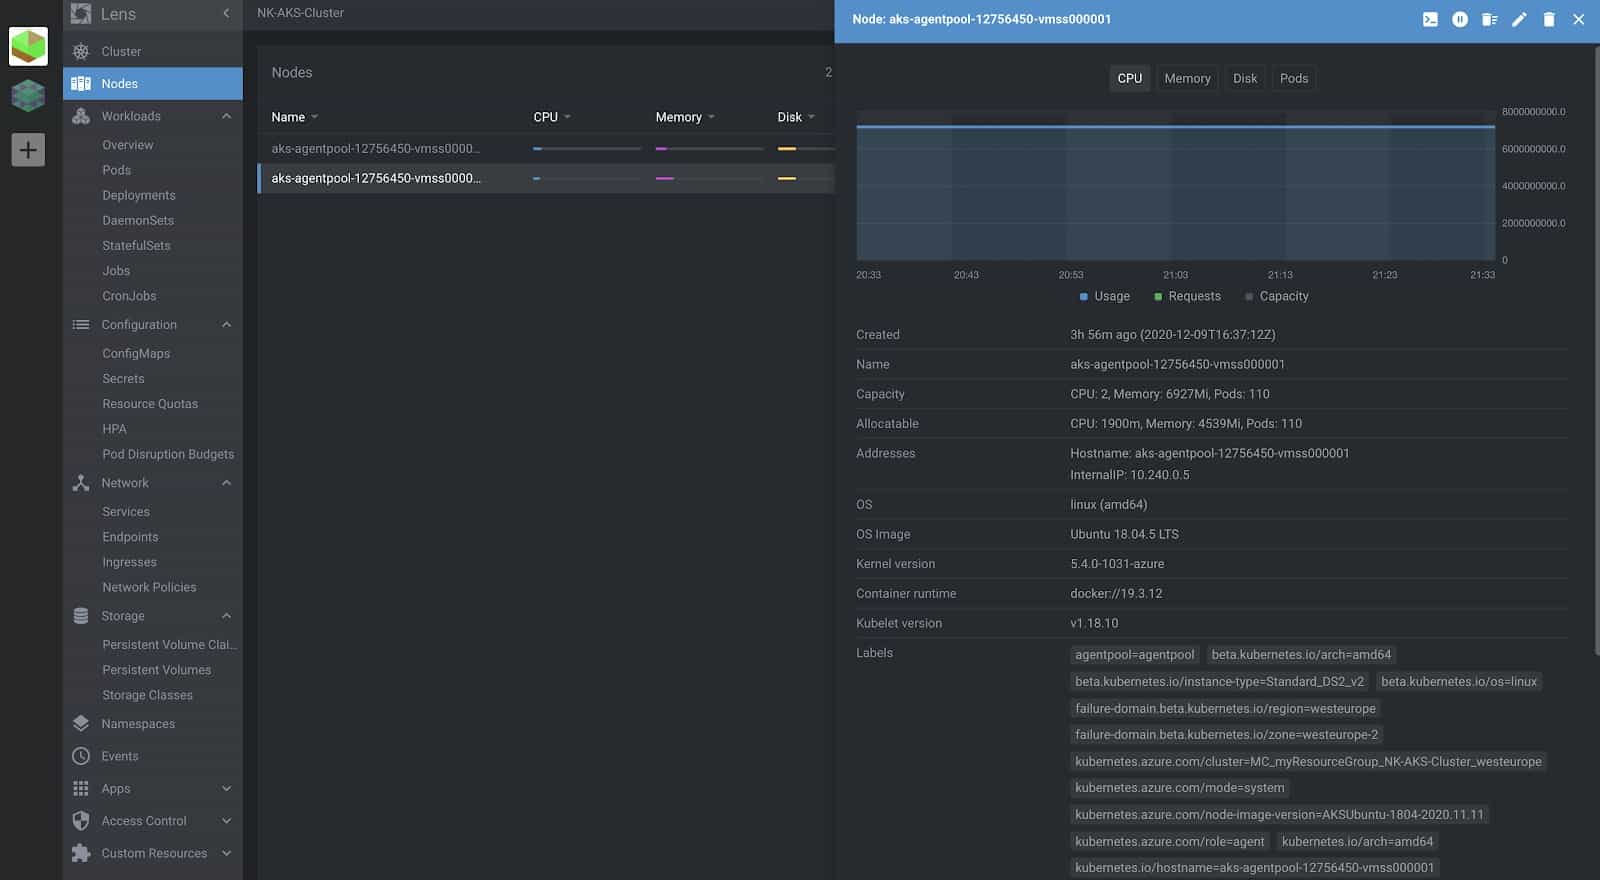
In the cluster overview, you can see all available cluster resources via a single pane of glass. You can view all your workloads, their current state, any related events and even filter them by namespaces. Clicking on any resource will pull up all the details about it– basically, the same as you would see from the output of:
kubectl get <daemonset|pod|deployment> -n <namespace> <name> -o yaml
Deploying an application
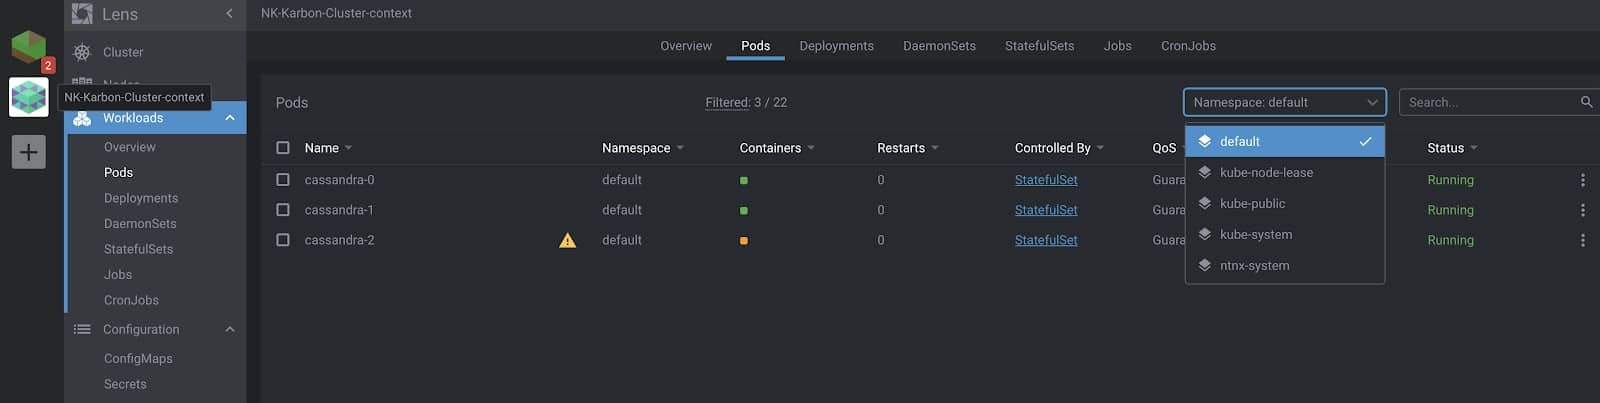
Here, I’ve added the Karbon cluster, as well in Lens. Let’s go ahead and deploy a Cassandra StatefulSet onto this cluster.
The YAML I used is below:
apiVersion: v1
kind: Service
metadata:
  labels:
    app: cassandra
  name: cassandra
spec:
  clusterIP: None
  ports:
  - port: 9042
  selector:
    app: cassandra
---
apiVersion: apps/v1
kind: StatefulSet
metadata:
  name: cassandra
  labels:
    app: cassandra
spec:
  serviceName: cassandra
  replicas: 3
  selector:
    matchLabels:
      app: cassandra
  template:
    metadata:
      labels:
        app: cassandra
    spec:
      terminationGracePeriodSeconds: 1800
      containers:
      - name: cassandra
        image: gcr.io/google-samples/cassandra:v13
        imagePullPolicy: Always
        ports:
        - containerPort: 7000
          name: intra-node
        - containerPort: 7001
          name: tls-intra-node
        - containerPort: 7199
          name: jmx
        - containerPort: 9042
          name: cql
        resources:
          limits:
            cpu: "500m"
            memory: 1Gi
          requests:
            cpu: "500m"
            memory: 1Gi
        securityContext:
          capabilities:
            add:
              - IPC_LOCK
        lifecycle:
          preStop:
            exec:
              command:
              - /bin/sh
              - -c
              - nodetool drain
        env:
          - name: MAX_HEAP_SIZE
            value: 512M
          - name: HEAP_NEWSIZE
            value: 100M
          - name: CASSANDRA_SEEDS
            value: "cassandra-0.cassandra.default.svc.cluster.local"
          - name: CASSANDRA_CLUSTER_NAME
            value: "K8Demo"
          - name: CASSANDRA_DC
            value: "DC1-K8Demo"
          - name: CASSANDRA_RACK
            value: "Rack1-K8Demo"
          - name: POD_IP
            valueFrom:
              fieldRef:
                fieldPath: status.podIP
        readinessProbe:
          exec:
            command:
            - /bin/bash
            - -c
            - /ready-probe.sh
          initialDelaySeconds: 15
          timeoutSeconds: 5
        volumeMounts:
        - name: cassandra-data
          mountPath: /cassandra_data
  volumeClaimTemplates:
  - metadata:
      name: cassandra-data
    spec:
      accessModes: [ "ReadWriteOnce" ]
      storageClassName: default-storageclass
      resources:
        requests:
          storage: 1Gi
Right after applying it, you can see the StatefulSet, services, pods, and other resources being created via Lens.
You can check out the live logs being updated for the Pods which is invaluable for troubleshooting. All of the events are recorded on the same page as well, which is the output of what you would see from:
kubectl describe pod cassandra-0
These are definitely great tools that would save you a lot of hassle and time during deployments.
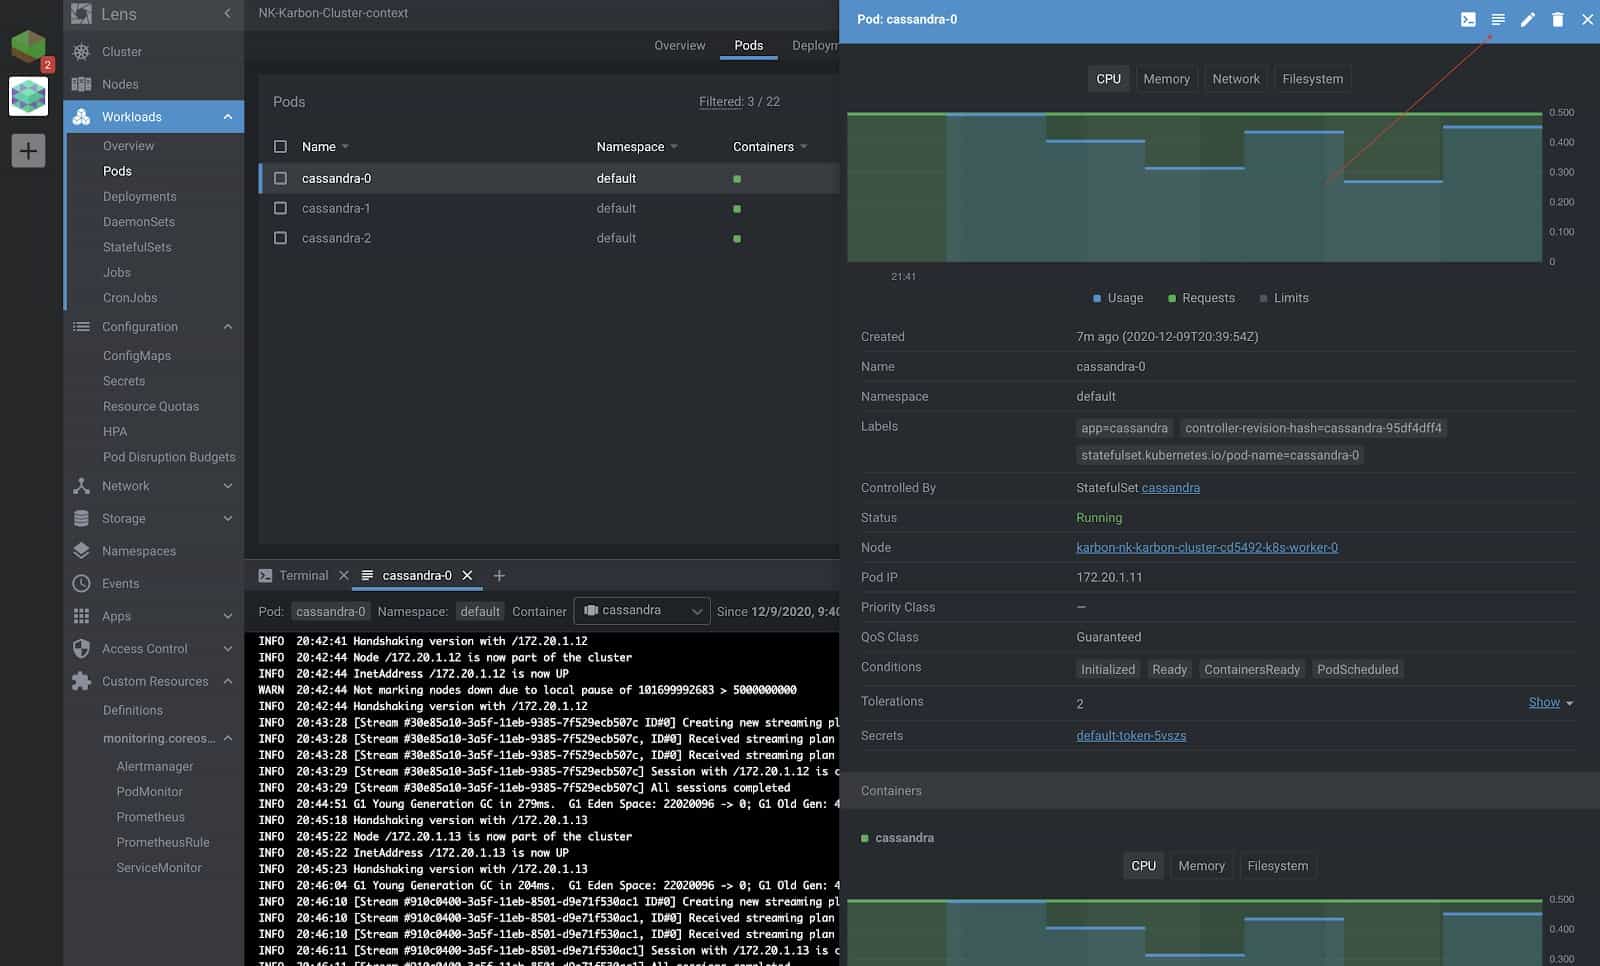
Furthermore, you could drop into the shell inside the pod as well on the same page. We verify that all the three nodes of the Cassandra cluster are running, as is shown in the screenshot below.

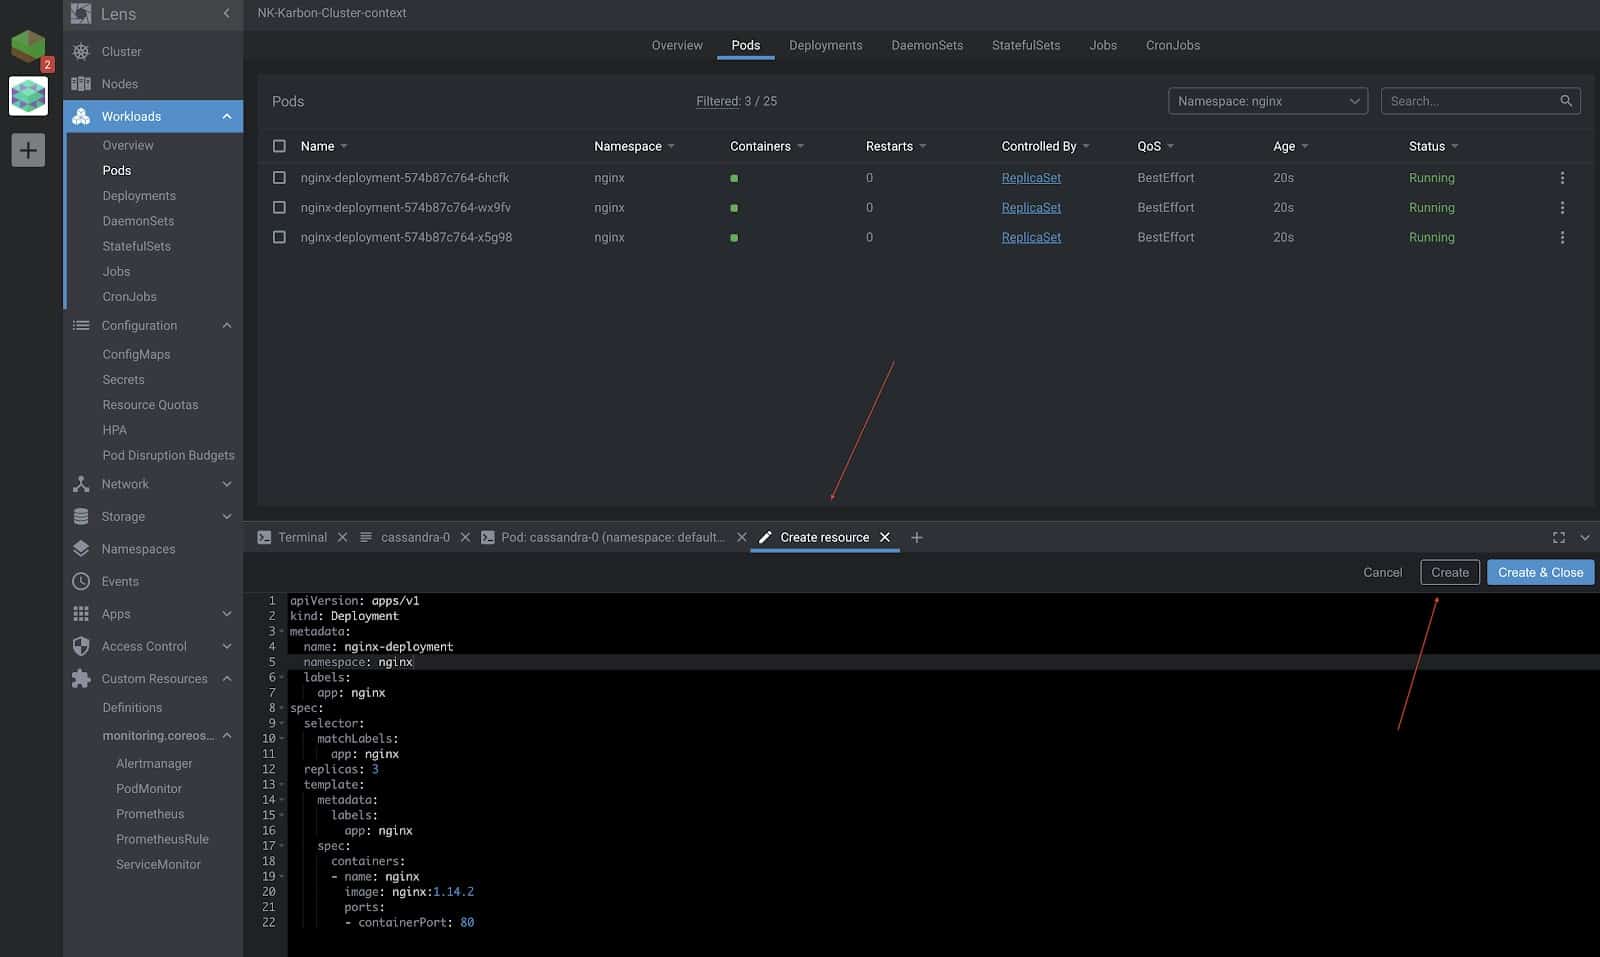
If you are still not impressed, Lens does give you the option to create, update, and delete resources right from its GUI as well as from the in-built terminal, which is automatically switched to the right context.
Let’s go ahead and deploy a ReplicaSet to bring up three nginx pods. This will be deployed in the “nginx” namespace which was again created from Lens.
RBAC Authorization
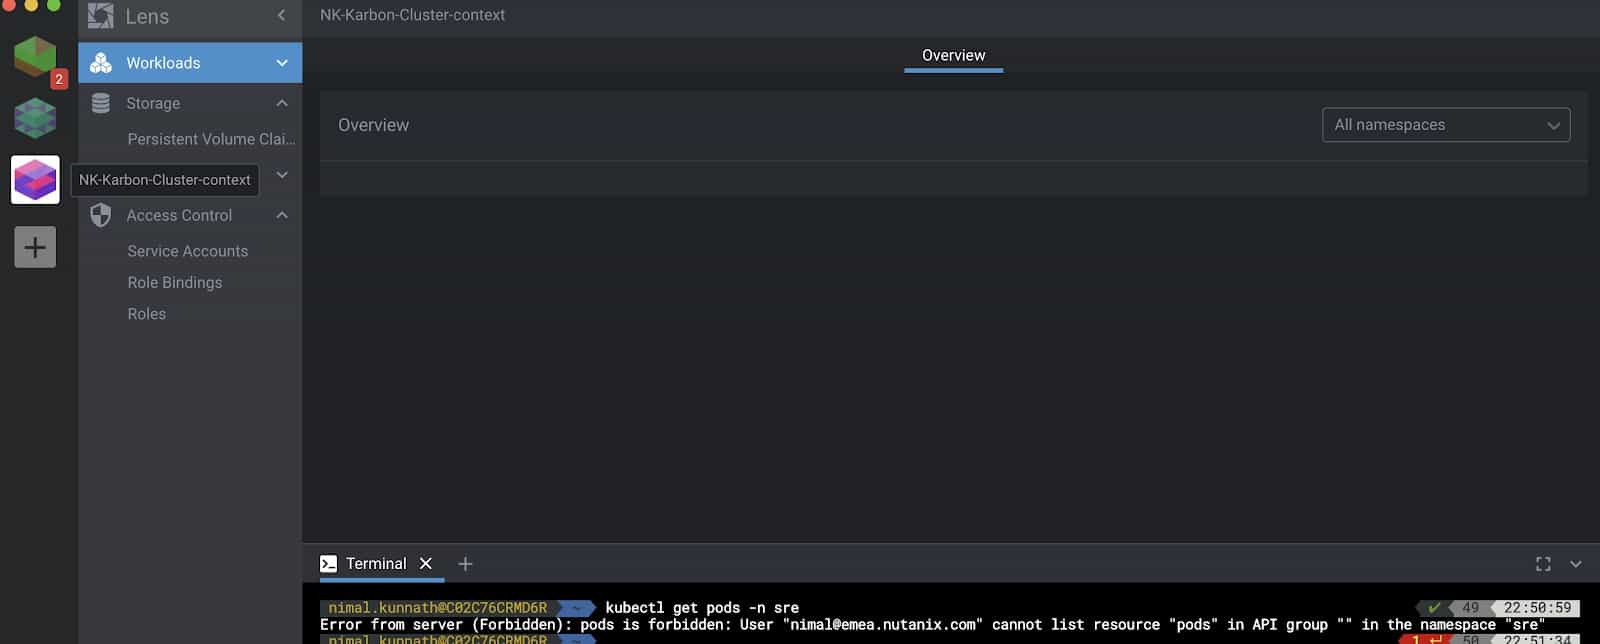
Kubernetes RBAC is supported, which means individual users connecting to Kubernetes clusters via Lens can only interact with the resources they are allowed to.
In the image below, you can see a domain user nimal@emea.nutanix.com has imported his kubeconfig file but he doesn’t have the authority to list any pods.
The cluster admin deploys the following YAML file, creating the Role sre-role and a RoleBinding sre-role-binding for this user nimal@emea.nutanix.com.
apiVersion: v1
kind: Namespace
metadata:
  name: sre
---
apiVersion: rbac.authorization.k8s.io/v1
kind: Role
metadata:
  namespace: sre
  name: sre-role
rules:
- apiGroups: ["", "apps", "batch", "extensions"]
  resources: ["services", "endpoints", "pods", "deployments"]
  verbs: ["get", "list", "watch"]
---
apiVersion: rbac.authorization.k8s.io/v1
kind: RoleBinding
metadata:
  namespace: sre
  name: sre-role-binding
subjects:
- kind: User
  name: nimal@emea.nutanix.com
  apiGroup: rbac.authorization.k8s.io
roleRef:
  kind: Role
  name: sre-role
  apiGroup: rbac.authorization.k8s.io
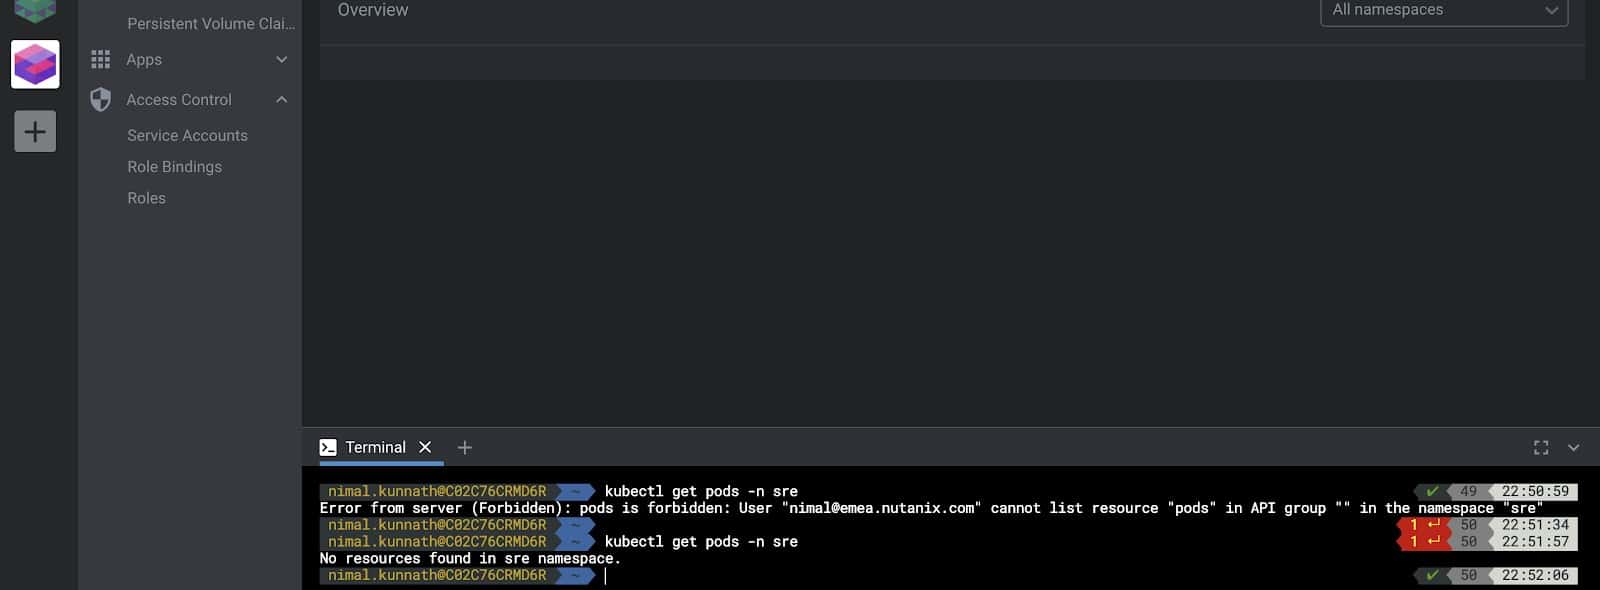
Following this, we see the user is authorized to perform the same action as seen below.
Conclusion
Kubernetes is a complex platform with a rapidly-expanding set of capabilities. Users are best served by tools and technologies that simplify Kubernetes management across the lifecycle. Lens, with its rich set of features and dashboard, offers Kubernetes admins an effective means of simplifying multicloud management. It requires minimal learning, offers easy context switching between multiple Kubernetes clusters, real-time cluster state visualization, and even enforcement of RBAC security using the standard Kubernetes API. Lens can significantly improve productivity, and it is an excellent choice to administer your Kubernetes clusters in a multicloud configuration!
About the Author
Nimal Kunnath is a Systems Reliability Engineer at Nutanix. With over 6 years of experience in datacenter products, he currently works on enterprise cloud services including virtualization, data storage, networking, containerization and distributed systems.