

Guest post originally published on Bitnami Docs by Vikram Vaswani
Introduction
Helm v3 was released a few months ago, bringing with a number of architectural changes and new features – most notably, the removal of Tiller and an improved upgrade process. To make it easier for users to transfer their Helm v2 releases to Helm v3, the Helm maintainers also released a plugin that takes care of migration tasks automatically.
After migrating your releases to Helm v3, you might come across some cases where subsequent upgrades fail – for example, when an upgrade attempts to modify an immutable field in a StatefulSet. In these situations, you can attempt to resolve the issue using one of the following methods:
- Back up the data from the migrated release and restore it in a new release using the application’s built-in backup/restore tools.
- Back up the persistent volumes from the migrated release and re-deploy them in a new release using Velero, a Kubernetes backup/restore tool.
This guide walks you through both these methods.
Assumptions and prerequisites
This guide makes the following assumptions:
- You have a Kubernetes cluster with kubectl and Helm v3 installed. This guide uses a Google Kubernetes Engine (GKE) cluster but you can also use any other Kubernetes provider. Learn about deploying a Kubernetes cluster on different cloud platforms and how to install kubectl and Helm.
- You have previously deployed a Bitnami Helm chart using Helm v2, added data to it and then migrated it to Helm v3 using the Helm migration plugin. Example command sequences to perform these tasks are shown below, where the PASSWORD and REPL-PASSWORD placeholders refer to the database and replication user passwords respectively.
helm2 repo add bitnami https://charts.bitnami.com/bitnami
helm2 install --name postgres bitnami/postgresql \
  --set postgresqlPassword=PASSWORD \
  --set replication.password=REPL-PASSWORD \
  --set replication.slaveReplicas=1 \
  --set replication.enabled=true \
  --namespace default
helm3 plugin install https://github.com/helm/helm-2to3
helm3 2to3 move config
helm3 2to3 convert postgres
Tip For illustrative purposes, this guide demonstrates how to resolve post-migration upgrade issues using the Bitnami PostgreSQL Helm chart. However, the same approach can also be followed for other Bitnami Helm charts, subject to certain caveats explained in the following sections.
Throughout this guide, helm2 refers to the Helm v2 CLI and helm3 refers to the Helm v3 CLI.
Method 1: Backup and restore data using built-in application tools
This method involves using the application’s built-in backup/restore functionality to backup the data in the existing release and then restore this data in a new Helm v3 release. This method is only suitable for those applications which have built-in backup/restore functionality.
Step 1: Back up data using built-in PostgreSQL tools
The first step is to back up the data in the running PostgreSQL release. Follow these steps:
- Obtain the PostgreSQL password:
export POSTGRES_PASSWORD=$(kubectl get secret --namespace default postgres-postgresql -o jsonpath="{.data.postgresql-password}" | base64 --decode) - Forward the PostgreSQL service port:
kubectl port-forward --namespace default svc/postgres-postgresql 5432:5432 & - Back up the contents of all the databases to a file using the PostgreSQL pg_dumpall tool. If this tool is not installed on your system, use Bitnami’s PostgreSQL Docker container image, which contains this and other PostgreSQL client tools, to perform the backup, as shown below:
docker run --rm --name postgresql -e "PGPASSWORD=$POSTGRES_PASSWORD" --net="host" bitnami/postgresql:latest pg_dumpall -h 127.0.0.1 -U postgres > all.sql
Here, the –net parameter lets the Docker container use the host’s network stack and thereby gain access to the forwarded port. The pg_dumpall command connects to the PostgreSQL service and creates an SQL output file containing all the database structures and records in the PostgreSQL cluster. Finally, the –rm parameter deletes the container after the pg_dumpall command completes execution. - Stop the service port forwarding.
At the end of this step, you should have a backup file containing the data from your running PostgreSQL release.
Step 2: Restore the data into a new PostgreSQL release
The next step is to create an empty PostgreSQL cluster and restore the data into it:
- Create a new PostgreSQL release in a separate namespace using Helm v3. Replace the PASSWORD and REPL-PASSWORD placeholders with the database and replication user passwords respectively.
kubectl create namespace postgres-new helm3 repo add bitnami https://charts.bitnami.com/bitnami helm3 install postgres bitnami/postgresql \ --namespace postgres-new \ --set postgresqlPassword=PASSWORD \ --set replication.password=REPL-PASSWORD \ --set replication.slaveReplicas=1 \ --set replication.enabled=true
TipIt is important to create the new release using the same credentials as the original release to avoid authentication problems. - Create an environment variable with the password for the new release:
export POSTGRES_PASSWORD=$(kubectl get secret --namespace postgres-new postgres-postgresql -o jsonpath="{.data.postgresql-password}" | base64 --decode) - Forward the PostgreSQL service port for the new release:
kubectl port-forward --namespace postgres-new svc/postgres-postgresql 5432:5432 & - Restore the contents of the backup file into the new release using the psql tool. If this tool is not available on your system, mount the directory containing the backup file as a volume in Bitnami’s PostgreSQL Docker container and use the psql client tool in the container image to import the backup file’s contents into the new cluster, as shown below:
docker run --rm --name postgresql -e "PGPASSWORD=$POSTGRES_PASSWORD" --net="host" bitnami/postgresql:latest pg_dumpall -h 127.0.0.1 -U postgres > all.sql
Here, the -v parameter mounts the current directory (containing the backup file) to the container’s /app path. Then, the psql client tool is used to connect to the PostgreSQL service and execute the SQL commands in the backup file, thereby restoring the data from the original deployment. As before, the –rm parameter destroys the container after the command completes execution. - Stop the service port forwarding.
- Connect to the new deployment and confirm that your data has been successfully restored:
kubectl run postgres-postgresql-client --rm --tty -i --restart='Never' --namespace postgres-new --image docker.io/bitnami/postgresql:11.7.0-debian-10-r9 --env="PGPASSWORD=$POSTGRES_PASSWORD" --command -- psql --host postgres-postgresql -U postgres -d postgres -p 5432
Step 3: Test the upgrade process (optional)
You should now be able to upgrade to a new release. You can test this with the following command, replacing the VERSION placeholder with the chart version you wish to upgrade to:
helm3 upgrade --version VERSION postgres bitnami/postgresql \
  --namespace postgres-new \
  --set postgresqlPassword=PASSWORD \
  --set replication.password=REPL-PASSWORD \
  --set replication.slaveReplicas=1 \
  --set replication.enabled=true
TipWhen upgrading the release, use the same parameters as when you installed it.
After confirming that all is in order, you can optionally delete your original release.
Method 2: Back up and restore persistent data volumes
This method involves copying the application’s persistent data volumes and reusing them in a new release. This method is only suitable for charts that allow using an existing persistent volume claim at install-time and on platforms supported by Velero. Many Bitnami Helm charts support this feature; review your specific chart’s available parameters for more information.
Step 1: Install Velero
Velero is an open source tool that makes it easy to backup and restore Kubernetes resources. It can be used to back up an entire cluster or, as shown below, it can be fine-tuned to only backup specific resources such as persistent volumes.
- Follow the Velero plugin setup instructions for your cloud provider. For example, if you are using Google Cloud Platform (as this guide does), follow the GCP plugin setup instructions to create a service account and storage bucket and obtain a credentials file.
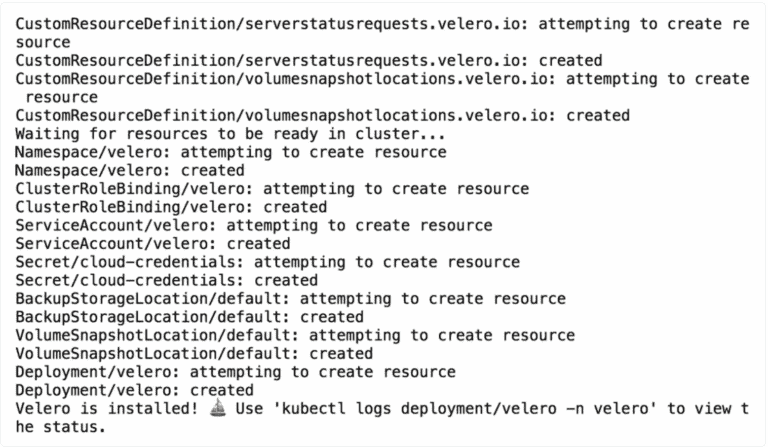
- Then, install Velero by executing the command below, remembering to replace the BUCKET-NAME placeholder with the name of your storage bucket and the SECRET-FILENAME placeholder with the path to your credentials file:
velero install --provider gcp --plugins velero/velero-plugin-for-gcp:v1.0.0 --bucket BUCKET-NAME --secret-file SECRET-FILENAMEYou should see output similar to the screenshot below as Velero is installed:
- Confirm that the Velero deployment is successful by checking for a running pod using the command below:
kubectl get pods -n velero
Step 2: Back up the persistent data volumes
Next, back up the persistent volumes using Velero.
- Create a backup of the volumes in the running PostgreSQL deployment. This backup will contain both the master and slave volumes.
velero backup create pgb --include-resources pvc,pv --selector release=postgres - Execute the command below to view the contents of the backup and confirm that it contains all the required resources:
velero backup describe pgb --details - To avoid the backup data being overwritten, switch the bucket to read-only access:
kubectl patch backupstoragelocation default -n velero --type merge --patch '{"spec":{"accessMode":"ReadOnly"}}'
Step 3: Copy the persistent volumes to a new PostgreSQL release
You can now restore the persistent volumes and integrate them with a new Helm v3 release.
- Restore the persistent volumes in a separate namespace using Velero. The –namespace-mappings parameter allows you to map resources from the original namespace to the new one.
kubectl create namespace postgres-new velero restore create --from-backup pgb --namespace-mappings default:postgres-new - Confirm that the persistent volumes have been restored in the target namespace and note the volume name for the master database node:
kubectl get pvc --namespace postgres-new - Delete the persistent volume corresponding to the slave node and retain only the volume corresponding to the master node. If there is more than one slave volume (depending on how you originally deployed the chart), delete all the slave volumes.
kubectl delete pvc --namespace postgres-new SLAVE-PVC-NAME - Create a new PostgreSQL release in the target namespace using Helm v3. Use the chart’s persistence.existingClaim parameter to create a release with an existing volume instead of a fresh one. Replace the PASSWORD and REPL-PASSWORD placeholders with the same database and replication user passwords used in the original release, and the MASTER-PVC-NAME placeholder with the name of the restored master node volume.
helm3 repo add bitnami https://charts.bitnami.com/bitnami helm3 install postgres bitnami/postgresql \ --set postgresqlPassword=PASSWORD \ --set replication.password=REPL-PASSWORD \ --set replication.slaveReplicas=1 \ --set replication.enabled=true \ --namespace postgres-new \ --set persistence.existingClaim=MASTER-PVC-NAME
Tip It is important to create the new release using the same credentials as the original release to avoid authentication problems.This will create a new release that uses the original master volume (and hence the original data). Note that if replication is enabled, as in the example above, installing the chart will automatically create a new slave volume for each slave node. - Connect to the new deployment and confirm that your original data is intact:
kubectl run postgres-postgresql-client --rm --tty -i --restart='Never' --namespace postgres-new --image docker.io/bitnami/postgresql:11.7.0-debian-10-r9 --env="PGPASSWORD=$POSTGRES_PASSWORD" --command -- psql --host postgres-postgresql -U postgres -d postgres -p 5432
Step 4: Test the upgrade process (optional)
You should now be able to upgrade to a new release. You can test this with the following command, replacing the VERSION placeholder with the chart version you wish to upgrade to:
helm3 upgrade --version VERSION postgres bitnami/postgresql --set postgresqlPassword=hell0 --set replication.password=repl --set replication.slaveReplicas=1 --set replication.enabled=true --namespace postgres-new --set persistence.existingClaim=data-postgres-postgresql-master-0
TipWhen upgrading the release, use the same parameters as when you installed it.
After confirming that all is in order, you can optionally delete your original release.