


The Google Summer of Code (GSOC) program 2017 has come to an end and we followed up with CNCF’s seven interns previously featured in this blog post to check in on how their summer project progressed.

Over the summer, UIET CSJM University student Amit Kumar Jaiswal worked with Red Hat mentor Miguel Perez Colino on“Create and Implement a Data Model to Standardize Kubernetes Logs,” a project aimed at building and implementing a data model for logs in a large Kubernetes cluster to process, correlate, and query to make troubleshooting easier and reduce the time in finding root causes.
Read on to learn the results of this project from Amit and Miguel.
Our GSoC project aims to standardize Kubernetes logs so the data contained in them can be easily used. Logging is one of the major challenges with any large distributed deployment on platforms such as Kubernetes, and configuring and holding a central repository for log collection becomes a need for the day-to-day operations, as well as for debugging microservices. For that final cause, the blending of Elasticsearch, Fluentd and Kibana can form a dynamic logging layer on top of Kubernetes clusters.
Many of the Kubernetes deployments require a fully containerized toolset to aggregate logs, process them, and make them available to users and administrators. In this blog we will show the efforts being made in project ViaQ to provide a full containerized Elasticsearch, Fluentd and Kibana, as well as the work being done under the CNCF umbrella, sponsored by Google Summer of Code, to improve the processing of the Kubernetes infrastructure log processing.
We will describe how to log Kubernetes using dedicated Fluentd, Elasticsearch and Kibana nodes. To do this, we will define our own pods so that when our cluster is created, the standard output and standard error output for each container is ingested into Elasticsearch and Kibana using a Fluentd agent.
Collecting logging with Fluentd
Even if some describe Fluentd as a ‘syslogd that understands JSON’, it does more than just collecting logs and redirecting them. Fluentd is a project under the CNCF umbrella and is capable of ingesting, tagging and pre-processing logs. Some notable features are:
- Easy installation by rpm/deb/gem
- Small footprint with 3000 lines of Ruby
- Semi-Structured data logging
- Easy start with small configuration
- Fully pluggable architecture, and plugin distribution by Ruby gems
We will be using containerized Fluentd to gather all of the logs that are stored within individual nodes in our Kubernetes cluster (these logs can be found under the /var/log/containers directory in the cluster) and also to ingest the logs coming from journald.
Installing and configuring Kubernetes
There are many Kubernetes distributions in the market. For this project we decided to use OpenShift Origin 1.5 as the distribution of choice. We analyzed also the CoreOS distribution (that also uses journald to gather logs).
ViaQ is a thin wrapper on top of https://github.com/openshift/origin-aggregated-logging
For this, ViaQ mainly provides the common data model used in Elasticsearch and Kibana: https://github.com/ViaQ/elasticsearch-templates/
To setup and running quickly with OpenShift Logging stack, you can use either the OpenShift Container Platform (OCP) based on RHEL7, or OpenShift Origin (Origin) based on CentOS7. Ansible is used to install logging using the OpenShift Ansible logging roles.
Prerequisites :
- Run a VM with CentOS 7.3 or later
- At least 4GB RAM for the VM
- Having OpenShift installed where we can deploy ViaQ wrapper
Walk-through to get up ViaQ Common Model running :
Check Machine Provisioning : I used a Machine that has been provisioned
Assign the machine an FQDN and IP address so that it can be reached from another machine – these are the public_hostname and public_ip
root@ith-ThinkPad-W520:/home/ith# hostname
ith-ThinkPad-W520
root@ith-ThinkPad-W520:/home/ith# hostname -f
ith-ThinkPad-W520
root@ith-ThinkPad-W520:/home/ith# ip a # IP Address i.e., accessible externally
root@ith-ThinkPad-W520:/home/ith# getent ahostsv4 `hostname`
127.0.1.1 STREAM ith-ThinkPad-W520
127.0.1.1 DGRAM
127.0.1.1 RAW
root@ith-ThinkPad-W520:/home/ith# getent hosts 127.0.0.1
127.0.0.1 localhost
Check SSH Configuration
root@ith-ThinkPad-W520:/home/ith# ll .ssh/
root@ith-ThinkPad-W520://home/ith# ssh-keygen -q -N “” -f /root/.ssh/id_rsa
Add the ssh pubkey to the user account $HOME/.ssh/authorized_keys [ So that Ansible doesn’t ask me to trust my IP address ]
- cat $HOME/.ssh/id_rsa.pub >> $HOME/.ssh/authorized_keys
Add the ssh hostkey for localhost to your SSH known_hosts [ Add root password keys to authorized key so that it doesn’t allow for passwordless ssh ]
- ssh-keyscan -H localhost >> $HOME/.ssh/known_hosts
Add the ssh hostkey for public_hostname to your SSH known_hosts
- ssh-keyscan -H **public_hostname** >> $HOME/.ssh/known_hosts
Check your authorized keys :
root@ith-ThinkPad-W520:/home/ith# more .ssh/known_hosts
root@ith-ThinkPad-W520:/home/ith# more .ssh/authorized_keys
This step is only needed if not using root – enable passwordless sudo e.g. in sudoers config:
- $USER ALL=(ALL) NOPASSWD:ALL
Setup ViaQ yum repository
ViaQ on Origin requires these Yum Repos. You will need to install the following packages: docker iptables-services
Grab the above link (Yum Repos) and copy the raw link of Yum Repo
Check root@ith-ThinkPad-W520:/home/ith# more etc/redhat-release
root@ith-ThinkPad-W520:/home/ith# curl -s https://raw.githubusercontent.com/ViaQ/Main/master/centos7-viaq.repo >> /etc/yum.repos.d/centos7-viaq.repo
Install OpenShift Ansible
Ansible is used to install ViaQ and OCP or Origin using OpenShift Ansible. The following packages are required: openshift-ansible openshift-ansible-callback-plugins openshift-ansible-filter-plugins openshift-ansible-lookup-plugins openshift-ansible-playbooks openshift-ansible-roles
# yum install openshift-ansible \
openshift-ansible-callback-plugins openshift-ansible-filter-plugins \
openshift-ansible-lookup-plugins openshift-ansible-playbooks \
Openshift-ansible-roles -y # Using yum
After installing Ansible packages, we need to patch Ansible
Go to openshift-ansible directory :
# cd /usr/share/ansible/openshift-ansible
Patch OpenShift Ansible
# curl https://raw.githubusercontent.com/ViaQ/Main/master/0001-Compatibility-updates-to-openshift_logging-role-for-.patch > 0001-Compatibility-updates-to-openshift_logging-role-for-.patch
# patch -p1 -b < 0001-Compatibility-updates-to-openshift_logging-role-for-.patch
Grab Ansible inventory and environment files :
Download the files vars.yaml.template and ansible-inventory-origin-36-aio
# curl https://raw.githubusercontent.com/ViaQ/Main/master/vars.yaml.template > vars.yaml.template
# curl https://raw.githubusercontent.com/ViaQ/Main/master/ansible-inventory-origin-36-aio > ansible-inventory
# more vars.yaml.template
Check Ansible Environment
You can use ansible to check some of the values, to see which values you need to edit. For example, use
root@ith-ThinkPad-W520:/home/ith# ansible -m setup localhost -a ‘filter=ansible_fqdn’
to see if ansible correctly reports your host’s FQDN, the public_hostname value from above. If so, then you do not have to edit openshift_public_hostname below. Use
root@ith-ThinkPad-W520:/home/ith# ansible -m setup localhost -a ‘filter=ansible_default_ipv4’
to see if ansible correctly reports your IP address in the “address” field, which should be the same as the public_ip value from above. If so, then you do not have to edit openshift_public_ip. You can also verify which IP address is used for external use by using the following command:
$ ip -4 route get 8.8.8.8
8.8.8.8 via 10.0.0.1 dev enp0s25 src 10.10.10.10 uid 1000
Once you have your inventory and vars.yaml, you can now copy it like :
root@ith-ThinkPad-W520:/home/ith# cp vars.yaml.template vars.yaml
Run Ansible
# cd /usr/share/ansible/openshift-ansible
# (or wherever you cloned the git repo if using git)
# ANSIBLE_LOG_PATH=/tmp/ansible.log ansible-playbook -vvv -e @/path/to/vars.yaml -i /path/to/ansible-inventory playbooks/byo/config.yml 2>&1 | tee output
where /path/to/vars.yaml is the full path and filename where you saved your vars.yaml file, and /path/to/ansible-inventory is the full path and filename where you saved your ansible-inventory file.
Check /tmp/ansible.log if there are any errors during the run. If this hangs, just kill it and run it again – Ansible is (mostly) idempotent. Same applies if there are any errors during the run – fix the machine and/or the vars.yaml and run it again.
After it completes the installation, you’ll now able to check logging components i.e., Elasticsearch, Fluentd and Kibana
Check Logging Components
[root@viaq openshift-ansible]# oc project logging
Already on project “logging” on server “https://viaq.logging.test:8443“.
To check operation of pods run below command which returns a complete list of pods that are currently defined:
[root@viaq openshift-ansible]# oc get pods
You should see the Elasticsearch, Curator, Kibana, Fluentd, and mux pods running.
Below are the given commands and these operation returns a complete list of services for Elasticsearch and Kibana that are currently defined:
[root@viaq openshift-ansible]# oc get svc
To see routes for Elasticsearch and Kibana, run below command:
[root@viaq openshift-ansible]# oc get routes
Deploy Logging Components
[root@viaq openshift-ansible]# oc logs -f logging-es-7vo926zw-2-phjrq|more
Check complete logs of all logging components here.
Also check your memory to ensure, given below is the command :
# free -h
To check basic information about pods, the oc describe operation can then be used to return detailed information about a specific pod:
[root@viaq openshift-ansible]# oc describe pod logging-curator-1-hklth
To check docker images of different pods:
[root@viaq openshift-ansible]# docker images|grep logging
Test Elasticsearch
To search Elasticsearch, first get the name of the Elasticsearch pod:
# oc project logging
# espod=`oc get pods -l component=es -o jsonpath='{.items[0].metadata.name}’`
Running Kibana
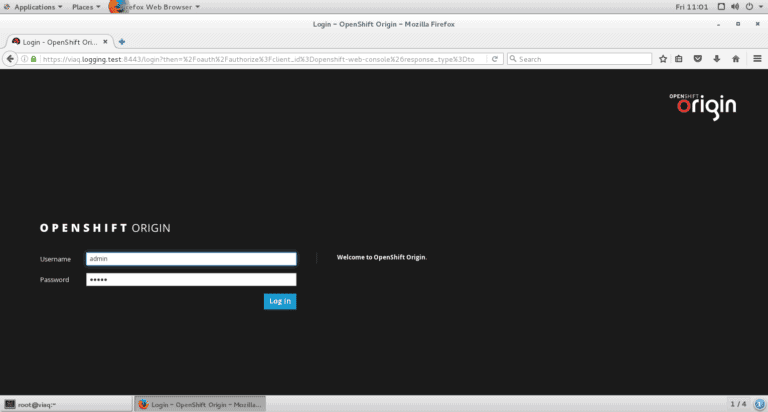
You will first need to create an OpenShift user and assign this user rights to view the application and operations logs. The install above uses the AllowAllPasswordIdentityProvider which makes it easy to create test users like this:
# oc project logging
Now using project “logging” on server “https://viaq.logging.test:8443“.
# oc login –username=admin –password=admin
# oc login –username=system:admin
Authentication required for https://viaq.logging.test:8443 (openshift)
# oadm policy add-cluster-role-to-user cluster-admin admin
cluster role “cluster-admin” added: “admin”
For complete log, check here.
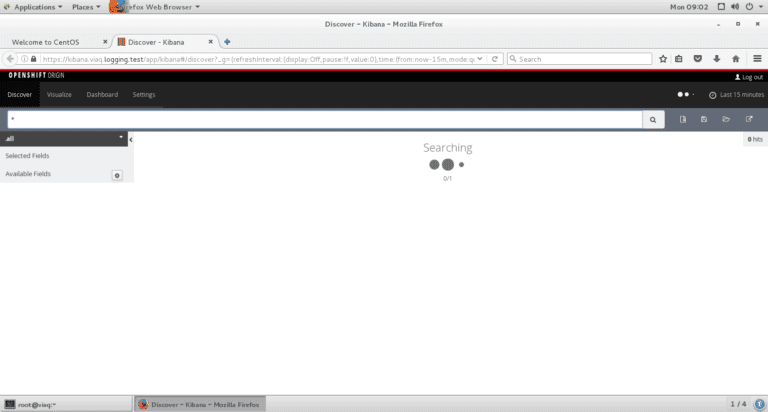
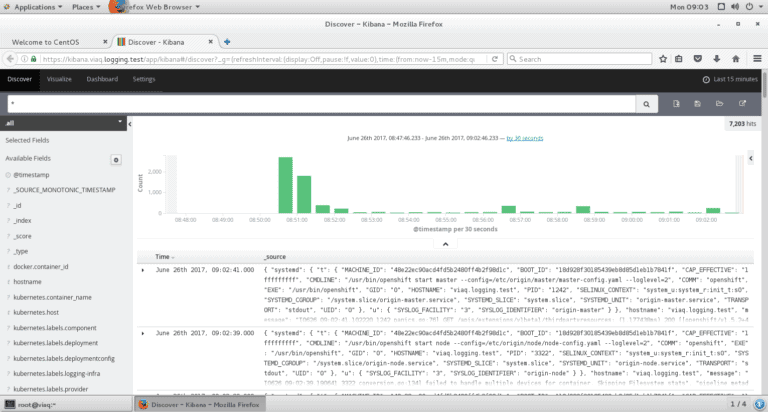
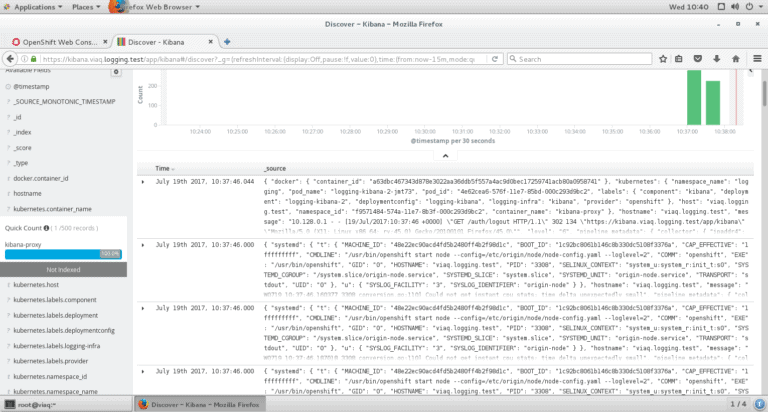
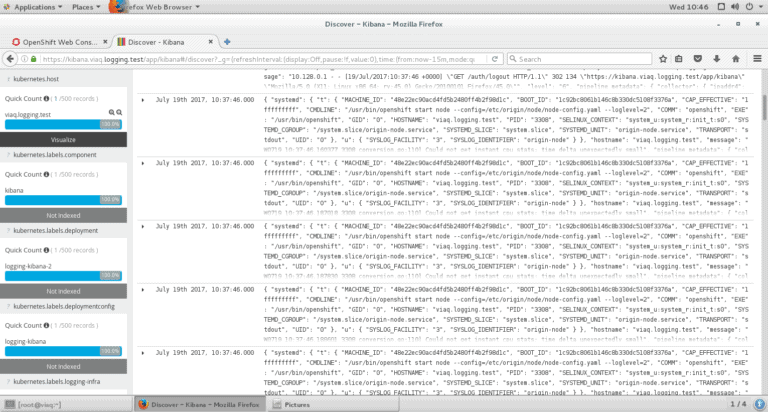
Now you can use the admin username and password to access Kibana. Just point your web browser at https://kibana.logging.test where the logging.test part is whatever you specified in the openshift_master_default_subdomain parameter in the vars.yaml file.
Installing and configuring Fluentd
First of all, we will need to install Fluentd (for instructions, use these installation guides).
Next, we will install the ViaQ fluent-plugin-kubernetes_metadata_filter, which allows Kubernetes to create symlinks to Docker log files in /var/log/containers/*.log (But if you installed ViaQ before then you don’t need to install above ViaQ fluentd plugin again).
Now, to view the logs from the entire cluster, we have to launch a single instance of the Fluentd agent on each of the nodes. Here is the Fluentd configuration file, which provides the path for the logging directory, in which Docker collect logs from pods and sends it to journald, then these logs get filtered in fluentd then the container name is detected.
Modification / Updation to Fluentd Config
This information is based on having a VM with OpenShift Logging stack ViaQ (EFK):
All the logs from journald get sent to fluentd. Fluentd is throttled and may lose logs if in a storm, but all the logs shall get processed under normal circumstances.
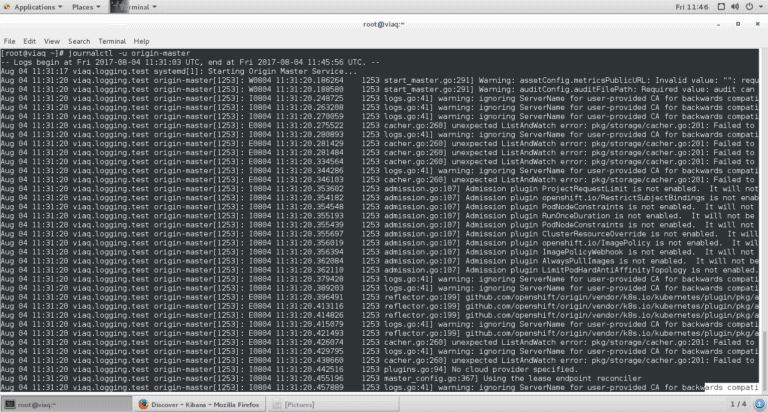
The OpenShift Origin master and node logs can be seen, in a root shell of the VM, with
# journalctl -u origin-master
# journalctl -u origin-node
To modify configuration of the fluentd pod it can be done via configmap
Check available ConfigMaps:
# oc get cm
# oc edit configmap logging-fluentd
To add new filters we need to go to the “fluent.conf” section and in the “<label @INGRESS>” section, where the filter-pre-*.conf is, add a new include file
@include configs.d/user/filter-my-filter.conf
Note: it has to be in “configs.d/user/” which is where ConfigMap drops the files.
Then we can add a new section for the new file
filter-my-filter.conf: |
<filter systemd.origin>
@type rewrite_tag_filter
rewriterule1 _SYSTEMD_UNIT ^origin-master.service journal.system.kubernetes.master
rewriterule2 _SYSTEMD_UNIT ^origin-node.service journal.system.kubernetes.node
</filter>
# do special processing on origin master logs
<filter journal.system.kubernetes.master>
@type record_transformer
enable_ruby
<record>
my_master_field ${record[‘MESSAGE’].match(/some regex/)[0]}
…
</record>
</filter>
We need to delete the fluentd pods after each changes/updates to refresh the configuration
# oc delete pods $FLUENTD_POD_NAME
If you have multiple pods, unlabel/relabel the nodes to affect multiple fluentds:
# oc label node -l logging-infra-fluentd=true logging-infra-fluentd=false
…. wait for fluentd pods to stop ….
# oc label node -l logging-infra-fluentd=false logging-infra-fluentd=true
To check if fluentd running well …
# oc logs $FLUENTD_POD_NAME
To check my fluentd filter, click here.
You may watch the video here.
The repository of this GSoC project is here.